
Your Malibu Attic Clean Out: A Clear Timeline From Start to Finish
When your attic collects dust, debris, or signs of critter activity, a clean out restores order and protects the living spaces below. In Malibu, coastal air, morning fog, and hillside winds can accelerate buildup, while wildlife pressure adds another layer of complexity. If you’re mapping out a project, having a practical timeline makes planning easier. This guide explains each step of a professional clean out, what can affect duration, and how to coordinate related tasks like ventilation checks and insulation upgrades. Homeowners beginning the process often start by arranging a professional assessment and scheduling thorough attic cleaning to set the stage for long-term results.
Because homes vary in size, access, and contamination level, timelines are tailored to each property. Still, most projects follow a predictable sequence. Understanding that sequence helps you schedule around work-from-home commitments, school routines, or other renovations with minimal disruption.
Phase 1: Assessment and Planning
Initial conversation: Share your concerns—odors, noises, or uneven temperatures. Provide photos if possible. This helps the team anticipate access needs and protective measures.
Onsite evaluation: A detailed look at insulation, framing, ductwork, vents, and signs of moisture or intrusion leads to a step-by-step plan. Photos document conditions and ensure clarity about what will be removed and what will be preserved.
Timeline confirmation: After the evaluation, you’ll receive a schedule that outlines staging, expected duration, milestones, and any dependencies if you plan to add insulation or coordinate other work.
Phase 2: Interior Protection and Setup
Pathway protection: Floor coverings run from the entrance to the attic hatch. Sensitive areas are shielded, and containment helps control dust migration into living spaces.
Equipment staging: Vacuum systems, lighting, and safety equipment are positioned for efficient movement in and out of the attic, especially important in homes with tight or elevated hatches.
Safety review: The crew verifies electrical safety, confirms clear communication, and double-checks the plan so each step proceeds smoothly.
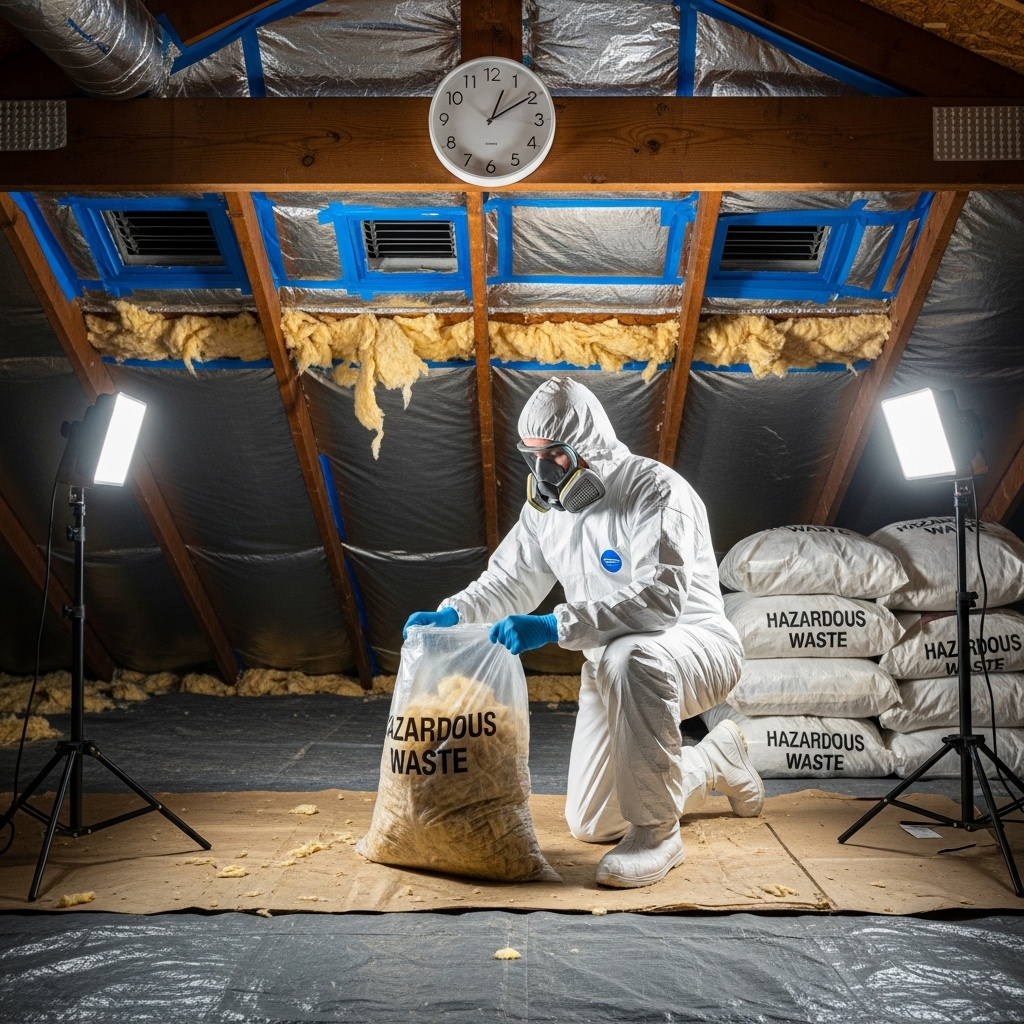
Phase 3: Removal and Debris Extraction
Bulk removal: Soiled insulation, droppings, and debris are extracted methodically. Specialized vacuum equipment helps contain fine particles. Bagged material is removed carefully to protect interior surfaces.
Discovery and documentation: As layers come up, hidden conditions may appear—unsealed penetrations, blocked vents, or loose duct connections. These are photographed and addressed in real time, with homeowner approval as needed.
Progress updates: Regular check-ins keep you informed, especially if the attic layout or access proves more complex than expected.
Phase 4: Detail Cleaning and Sanitation
Fine cleaning: HEPA vacuuming, careful wipe-downs of joists and decking, and attention to corners reduce residual dust that can contribute to odors and allergy triggers.
Targeted sanitation and deodorizing: Where rodent activity or musty smells exist, treatments neutralize sources. The focus is on eliminating causes rather than masking odors.
Vent clearing: Soffit and gable vents are checked and cleared of obstructions to restore balanced airflow.
Phase 5: Exclusion and Sealing
Entry point sealing: Gaps around pipes, wiring, and vents are sealed to discourage re-entry. Screens are repaired or reinforced to protect against critters.
Air sealing for comfort: Penetrations that allow attic air to mix with indoor air are addressed. This step supports healthier indoor air quality and more stable temperatures below.
Phase 6: Preparing for Insulation (Optional but Common)
Once the attic is clean and sealed, many homeowners choose to restore or upgrade insulation. The space is prepped by installing baffles to maintain airflow near soffits and by establishing appropriate clearances around heat-producing fixtures and equipment. Even coverage is key to consistent thermal performance.
What Shapes the Timeline
Access and layout: A straightforward hallway hatch speeds movement. Tight scuttle openings, low roof pitches, or complex framing slow progress and require more careful staging.
Attic size: Larger attics take longer to clear and detail. Multi-structure properties—such as homes with attached garages or accessory spaces—may add steps.
Contamination level: Light dust cleanup proceeds quickly. Extensive rodent activity, damp materials, or ash accumulation from past wildfire events adds methodical work and targeted sanitation.
Ducts and equipment in the attic: If HVAC ducts or air handlers run through the space, crews work carefully to protect and, when needed, adjust supports or connections. Discovery of damaged sections may prompt quick repairs that extend the timeline slightly but improve overall results.
Weather and property logistics: Marine layer moisture, heat, and hillside access can affect pacing. Planning staging areas and addressing parking or power needs in advance helps the day run smoothly.
Working Comfortably With a Crew in Your Home
Professional teams value communication. Expect a quick morning briefing, midday progress notes, and an end-of-day summary if the project spans more than one day. Interior paths are kept clean, and debris is removed as it’s generated. If you work from home, share your schedule so noisier steps align with your preferences.
Results You Can See and Feel
After a clean out, you should notice fresher air and the absence of attic-related odors. Visual documentation will show clean joists and decking, sealed penetrations, and clear vent pathways. If you choose to add insulation, indoor temperatures typically feel more stable, especially in rooms just beneath the attic.
Pairing Your Clean Out With Other Improvements
Many homeowners coordinate duct sealing, bath fan corrections, or roof vent updates during or shortly after the clean out. Sequencing work avoids re-disturbing freshly cleaned areas. Aligning specialists can save time and reduce disruptions.
Frequently Asked Questions
Q: How long will my clean out take? A: Duration depends on attic size, access, and the degree of contamination or debris. Most single-family homes fit within a clearly defined window, while larger or more complex spaces can extend beyond that.
Q: Do I need to prepare anything? A: Clear the area beneath the attic hatch, reserve parking if needed, and share any observations about odors or noises to guide the inspection.
Q: Can I stay home during the project? A: Yes. Pros use containment and communicate about steps that produce more noise or movement so you can plan your day comfortably.
Q: What about rodent issues? A: Expect targeted removal of contaminated material, sanitary treatments, and thorough exclusion to prevent recurrence.
Q: Will my vents be addressed? A: Yes. Clear, balanced ventilation is essential. Crews ensure soffits and other openings are unobstructed and protected.
Q: Is insulation always included? A: Not always. Some homeowners focus on cleaning and exclusion first, then add insulation as a follow-up step. The sequence is flexible.
Q: How do I maintain results? A: Trim vegetation near the roofline, check vents seasonally, and schedule quick inspections if you notice odors or unusual sounds above the ceiling.
Set Expectations and Enjoy a Cleaner, Healthier Home
With a clear timeline and a well-sequenced plan, an attic clean out becomes a predictable, low-stress project. You’ll gain a cleaner, sealed space that supports better air and comfort in the rooms below. If you’re ready to move forward, schedule your Malibu attic cleaning with a trusted local team, align any related upgrades, and enjoy the lasting benefits of a refreshed attic.