
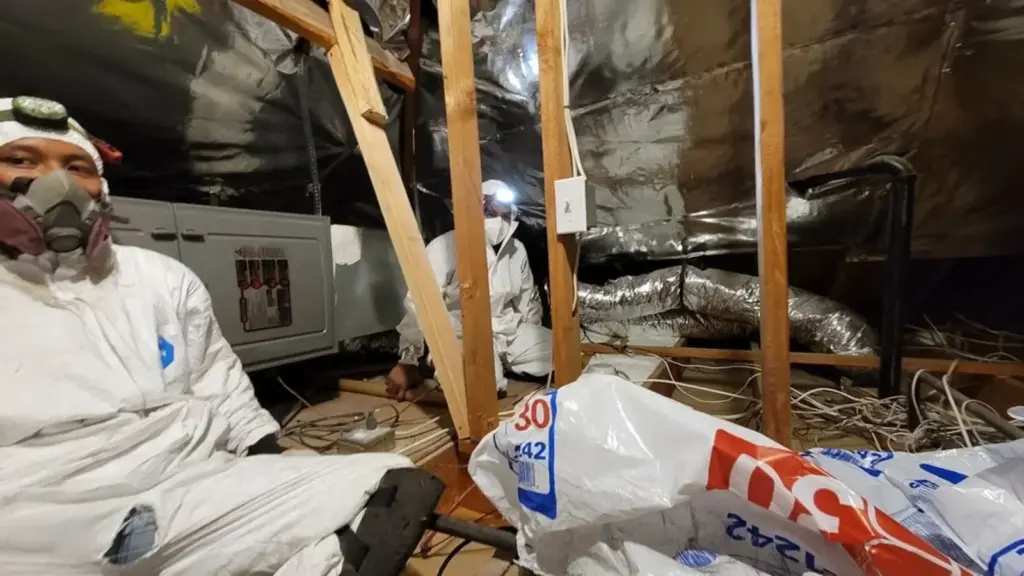
How to Prepare Your Camarillo Home for Attic Insulation Installation
Scheduling attic insulation installation in Camarillo is one of the smartest moves you can make for your home’s comfort and energy efficiency. But the difference between a smooth, one-day job and a drawn-out, complicated one often comes down to what you do before the crew arrives. This guide walks you through every practical step, room by room and system by system, so your installation day goes exactly as planned.
Why Preparation Matters More Than Most Homeowners Expect
The Attic Is Not an Isolated Space
Most people think of their attic as separate from the rest of the house. In reality, it connects directly to your HVAC system, your electrical wiring, your plumbing vents, and your living space through ceiling penetrations. When a crew is working overhead, vibrations, debris, and displaced air all travel downward. A little prep work protects your belongings, your finishes, and the technicians doing the work.
Camarillo’s Climate Creates Specific Conditions
Camarillo sits in a coastal-influenced climate zone where summer afternoons can push attic temperatures well above 130 degrees Fahrenheit. That heat bakes any existing insulation, dries out wood framing, and can leave behind a fine layer of particulate dust on every surface in the attic. Before new insulation goes in, the existing conditions need to be assessed and addressed. An experienced attic insulation contractor in Camarillo will evaluate what’s already up there, but your preparation makes that assessment faster and more accurate.
Old Insulation May Need to Come Out First
Not every attic insulation job starts with a clean slate. If your current insulation is contaminated by rodent activity, moisture damage, or simply too degraded to provide a useful base, removal comes before installation. LA Attic Pro handles both insulation removal and new installation, so ask during your consultation whether your attic falls into this category. Knowing ahead of time lets you plan for a slightly longer project window.
Step-by-Step Pre-Installation Checklist for Camarillo Homeowners
Clear the Attic Access Point
This sounds obvious, but it’s the step most homeowners overlook. Whether your attic hatch is in a hallway closet, a bedroom ceiling, or the garage, the area around it needs to be completely clear. Move clothing, boxes, and furniture at least six feet back from the opening. The crew will be pulling equipment in and out repeatedly, and a cluttered access point slows everything down and risks damage to your belongings.
If your attic access is a pull-down stair, test it before the appointment. A stair that sticks, wobbles, or has a broken spring creates a safety hazard for technicians carrying equipment. Let the company know in advance if there’s an issue, and they can plan accordingly or arrange a repair.
Protect the Rooms Below
Even with careful technique, attic work generates some dust and debris. Cover furniture in the room directly below the access hatch with drop cloths or old sheets. Remove any fragile items, artwork, or electronics from that space. If your home has recessed lighting fixtures in the ceiling below the attic, know that these are penetrations where debris can fall through. A piece of tape over the trim ring and a quick wipe-down after the job is a simple precaution.
Identify and Flag Attic Obstructions
Before the crew arrives, if you’re able to safely look into your attic (without walking on the joists), note anything that might affect the work. Common obstructions include:
- Stored boxes or seasonal items sitting directly on the attic floor
- Old HVAC equipment or abandoned ductwork
- Low-hanging electrical junction boxes without proper covers
- Plumbing vent pipes that extend through the insulation zone
- Attic fans or whole-house fan assemblies
You don’t need to move these yourself. Just make a note and mention them during your pre-job walkthrough. A good attic insulation service in Camarillo will do their own inspection, but your observations help them prepare the right materials and equipment.
Addressing Moisture and Ventilation Before the Job
Check for Visible Moisture Stains
Camarillo’s marine layer can push moisture into poorly ventilated attic spaces, particularly in homes near the coast or in low-lying areas. If you notice water stains on your ceiling or rafters, that moisture issue needs to be resolved before new insulation goes in. Trapping wet conditions under a fresh layer of insulation accelerates wood rot and can create conditions that encourage mold growth over time.
If you’re unsure whether stains are old or active, check after a foggy morning or a rare rain event. Fresh dampness indicates an active problem. Your contractor can advise on whether the source is a roofing issue, a ventilation gap, or a condensation problem from inadequate vapor management.
Confirm Your Attic Ventilation Is Functional
Proper attic ventilation works hand-in-hand with insulation. Soffit vents, ridge vents, and gable vents all need to be clear and unobstructed for insulation to perform correctly. Blocked soffit vents are one of the most common problems crews encounter in Camarillo homes, often caused by old insulation pushed up against the eaves over the years.
During your pre-installation inspection, a qualified technician will check ventilation as part of their assessment. If baffles need to be installed to keep new insulation from blocking soffit vents, that work typically happens during the installation itself. Just know it’s part of the process, not an unexpected add-on.
Seal Obvious Air Leaks Where You Can
Air sealing and insulation work best together. Before installation day, walk through your home and check for obvious gaps where conditioned air escapes: around recessed lights, at the tops of interior walls, around plumbing and electrical penetrations in the ceiling. You don’t need to seal everything yourself. But if you can identify the most obvious gaps, mention them to your contractor. Air sealing those spots before insulation goes down is far easier than doing it afterward.
What to Do With HVAC Equipment and Ductwork
Schedule HVAC Maintenance Separately, If Needed
If your air handler or any ductwork runs through the attic, installation day is not the time to discover a duct that needs repair. LA Attic Pro offers both air duct repair and air duct replacement services, so if you’ve noticed reduced airflow, unusual sounds from the attic, or rooms that never quite reach the right temperature, address those concerns before the insulation work begins. Accessing ducts after new insulation is blown in is possible but more disruptive.
Turn Off the HVAC System During Installation
On the day of installation, your contractor will likely ask you to turn off your HVAC system. This prevents loose insulation fibers from being drawn into the air handler and circulated through the house. It also keeps the attic temperature from fluctuating while technicians work. Plan for this by pre-cooling or pre-heating your home the morning of the job, and have a plan for pets or family members who may be sensitive to temperature swings during the work window.
Note the Location of Attic HVAC Components
If your attic contains an air handler, a furnace, or a heat pump, make sure the crew knows exactly where those units are before they start. Insulation needs to be kept clear of certain clearances around combustion equipment for both safety and code compliance. Requirements vary by equipment type and local jurisdiction, so always defer to your contractor’s assessment and your local building department’s guidelines rather than assuming a specific clearance distance.
Rodent Activity: The Issue Camarillo Homeowners Can’t Ignore
Signs That Rodent Proofing Should Come First
Camarillo’s surrounding open spaces mean rodent pressure is a real factor for many homeowners, particularly those near agricultural land or hillside properties. Installing fresh insulation over an active or past rodent problem is a waste of money. New insulation becomes nesting material almost immediately if entry points remain open.
Before your insulation appointment, look for these warning signs:
- Droppings in the attic or along the tops of interior walls
- Chewed insulation, wiring, or wood
- Grease marks along rafters or entry points
- Scratching or movement sounds at night
If any of these are present, mention them when you book. LA Attic Pro provides rodent proofing and rodent sanitation services, and it makes far more sense to handle exclusion and cleanup before new insulation goes in than to deal with a repeat problem six months later.
If you want it handled correctly the first time, consider professional insulation installation in Malibu, CA 90265 Los Angeles County.
What Rodent Sanitation Involves
If there’s evidence of past rodent activity, contaminated insulation typically needs to be removed and the attic sanitized before new material is installed. This involves removing soiled insulation, treating the space, and sealing entry points. It’s a more involved process than a straightforward insulation job, but it’s the only way to protect your investment in new insulation and maintain healthy air quality in your home.
The Day-Before and Day-Of Checklist
Practical Logistics to Handle the Day Before
A few simple logistics make installation day run smoothly:
- Confirm the appointment window and make sure someone will be home to provide attic access and answer questions.
- Move vehicles out of the driveway if the crew will be bringing a blower truck. These vehicles are large and need direct access to run the hose to your attic.
- Secure pets in a room away from the work area. Attic access points, open doors, and unfamiliar equipment can stress animals and create hazards.
- Clear the path from the front door (or garage) to the attic access of any tripping hazards, rugs that could slip, or furniture that narrows the corridor.
- Cover HVAC vents in the room below the attic hatch with a piece of plastic sheeting and tape, as a precaution against fine dust settling into the duct system.
What to Expect on Installation Day
A typical blown-in insulation installation for a standard Camarillo home takes anywhere from a few hours to a full day, depending on attic size, access conditions, and whether any prep work like air sealing or baffle installation is included. The crew will run a large-diameter hose from a truck-mounted blower machine up through the attic access. Loose-fill fiberglass or cellulose is then blown in to the specified depth, which is calculated to meet your target R-value.
You’ll be able to walk through the attic afterward to see the finished depth. A reputable contractor will show you the depth gauge markers left in the insulation so you can verify the coverage yourself.
After the Installation: What to Check
Once the crew wraps up, do a quick walkthrough of your own:
- Check that the attic access hatch closes fully and seals properly. Many contractors will add weatherstripping or an insulated cover to the hatch as part of the job.
- Confirm soffit vents are still visible and unobstructed from inside the attic (if you can safely look).
- Turn your HVAC system back on and let it run for 20-30 minutes, then check your filters. A small amount of fine dust on the filter is normal; heavy debris is not.
- Note whether rooms that were previously too hot or too cold begin to feel more balanced over the following days.
Comparison: Prepared vs. Unprepared Installation Day
| Scenario | Prepared Homeowner | Unprepared Homeowner |
|---|---|---|
| Attic access | Clear path, tested hatch | Blocked by stored items, delayed start |
| Rodent issues | Identified and addressed beforehand | Discovered mid-job, work paused |
| Moisture problems | Flagged and resolved pre-install | Trapped under new insulation |
| HVAC system | Off, ducts noted, maintenance done | Running, debris risk, duct issues unknown |
| Ventilation baffles | Discussed, materials on-hand | Unexpected add-on, possible return visit |
| Post-job satisfaction | Clean, efficient, one-visit completion | Callbacks, additional charges, frustration |
Choosing the Right Attic Insulation Contractor in Camarillo
What a Thorough Pre-Installation Inspection Looks Like
Before any reputable contractor starts work, they should physically inspect your attic, not just look at it from the hatch. They should be checking existing insulation depth and condition, ventilation status, signs of moisture or pest activity, the condition of any ductwork, and the location of electrical junction boxes. If a contractor skips this step and goes straight to quoting, that’s a signal to ask more questions.
LA Attic Pro serves Camarillo and the broader Ventura County area with a full-service approach that includes this kind of thorough pre-job assessment. With a 5-star rating across 34 Google reviews, the team has built a track record of doing the job right the first time.
Questions Worth Asking Before You Book
A few questions worth raising with any attic insulation service in Camarillo before you commit:
- What R-value are you recommending, and why is that appropriate for this climate zone?
- Will you check and address soffit vent baffles as part of the job?
- Is air sealing included, or is it a separate scope of work?
- What happens if you find rodent activity or moisture damage during the inspection?
- What material are you using, and what are the pros and cons for my specific attic configuration?
Good answers to these questions indicate a contractor who thinks about the whole system, not just the insulation product itself.
Permits and Local Requirements
Permit requirements for attic insulation vary by municipality and project scope. In Ventura County, some insulation projects may require a permit, particularly if they’re combined with electrical work or significant air sealing. Requirements can also change based on whether the home is in a fire hazard severity zone. Always check with your local building department or ask your contractor what applies to your specific address. Never rely on a blog post, including this one, as a definitive guide to code compliance.
Frequently Asked Questions
How long does attic insulation installation take in a typical Camarillo home?
Most residential jobs in Camarillo take between three and eight hours, depending on attic size, access conditions, and whether any prep work like air sealing or baffle installation is included. Your contractor can give you a more specific window after the pre-job inspection.
Do I need to remove old insulation before adding new insulation?
Not always. If existing insulation is dry, pest-free, and in reasonable condition, new material can often be blown in on top to bring the total depth up to the target R-value. If the old insulation is contaminated, wet, or heavily degraded, removal is the right first step. Your contractor’s inspection will determine which situation applies.
Can I stay in my home during the installation?
Yes, in most cases. The work is contained to the attic. You’ll want to keep children and pets away from the work area and be prepared for some noise from the blower equipment. Your HVAC system will be off during the job, so plan for a few hours without heating or cooling.
What R-value do homes in Camarillo typically need?
California’s Title 24 energy code sets minimum requirements, and recommendations for existing homes often exceed those minimums for optimal performance. Camarillo’s climate zone typically calls for R-38 to R-60 in the attic, but your contractor will assess your current depth and recommend the appropriate target based on your specific home and existing conditions.
How soon will I notice a difference after installation?
Many homeowners notice a difference within the first heating or cooling cycle after installation. Rooms that were previously uncomfortable often feel more consistent. The full impact on energy bills becomes clearer over the following months as seasonal temperatures fluctuate.
Does LA Attic Pro handle both removal and new installation?
Yes. LA Attic Pro offers insulation removal, new installation, air sealing, rodent proofing, rodent sanitation, and related attic services. If your attic needs multiple types of work, the team can assess the full scope and handle it in the right sequence.
Conclusion
A well-prepared home makes for a faster, cleaner, and more effective attic insulation installation. Clear the access, address any moisture or pest concerns beforehand, confirm your HVAC system is in good shape, and communicate openly with your contractor during the pre-job walkthrough. Camarillo homeowners who take these steps consistently get better results and fewer surprises. When you’re ready to move forward, schedule your attic insulation installation with LA Attic Pro and let the team put together a plan tailored to your home.