
Even careful insulation installation can face performance hiccups once exposed to real-world California conditions: coastal humidity, inland heat waves, mountain chill, and seasonal winds. Advanced troubleshooting pinpoints why comfort or energy results lag expectations and provides precise corrections. Whether you’re diagnosing uneven room temperatures, condensation on cold mornings, or persistent drafts, this guide shows you how to analyze assemblies, test assumptions, and apply targeted fixes that restore thermal performance and protect building durability.
Because assemblies are interdependent, treat insulation, air sealing, vapor control, and ventilation as a system. A weakness in one area can create symptoms elsewhere. If your investigation leads to complex corrections or specialized equipment, consider partnering with local experts in insulation installation to accelerate testing and repairs while keeping work aligned with California’s energy performance goals.
What follows is a field-proven framework: identify the symptom, map likely causes, measure and test, then execute a fix that addresses the root of the problem—not just the surface.
Symptom: Rooms Too Hot in Summer, Too Cold in Winter
When rooms swing wildly with the weather, the culprits often include inadequate attic insulation, thermal bridging, blocked ventilation, or uncontrolled air leakage. Verify attic R-values and coverage. If loose fill has settled below target depth, top up to restore performance. Confirm that baffles maintain soffit airflow and that exhaust vents are open and unobstructed.
Thermal bridges through framing bypass cavity insulation. In attics, add a perpendicular layer of batts over joists or increase loose-fill depth for uniform coverage. In walls, consider exterior continuous insulation during siding work to reduce conductive losses through studs and headers. Seal air leaks at top plates, rim joists, and penetrations to stabilize indoor temperatures.
Symptom: Drafts and Dust
Drafts suggest air leakage more than insufficient R-value. Track pathways from the attic and crawl space into living areas: gaps around plumbing stacks, electrical penetrations, top and bottom plates, and recessed lights. Seal these with appropriate materials, observing fire safety clearances. Weatherstrip the attic hatch and any access panels.
Dust can ride air currents from unconditioned spaces. Air sealing combined with filtration improvements helps reduce particulates. In older homes, chase pathways behind walls can act like chimneys; sealing top and bottom boundaries helps control these hidden bypasses.
Symptom: Condensation, Musty Odors, or Staining
Moisture is often an air problem in disguise. Warm, humid air leaking into cooler cavities can condense on cold surfaces. Balance airtightness with ventilation. Ensure bath and kitchen fans discharge outdoors and that attic ventilation is neither blocked nor excessive. Excess ventilation without proper baffles can cause wind-washing that cools insulation and invites condensation along roof edges.
Inspect roof penetrations, flashing, and exhaust ducts for leaks. In coastal and mountain climates, monitor indoor humidity and use targeted dehumidification or ventilation strategies as needed. Avoid interior vapor barriers unless the assembly is specifically designed for them in your climate zone.
Symptom: Uneven Temperatures Between Floors
Stack effect can drive air from lower levels to upper levels in winter and reverse in certain summer conditions. Seal at the top and bottom of the building: attic penetrations, rim joists, and crawl space openings. Improve insulation at the attic and floor levels first, then verify that interior doors and returns allow balanced airflow. If HVAC ducts are in unconditioned spaces, inspect for leaks and insulation; duct leakage undermines both comfort and energy savings.
In multi-level homes, knee walls and sloped ceilings are common weak spots. Ensure knee wall cavities are insulated and backed with an air barrier, and that sloped ceilings have full-depth insulation without compression around rafters and skylight wells.
Symptom: High Energy Bills Despite Insulation
When bills remain high, quantify leakage with a blower-door test and use thermal imaging to locate voids and thermal bridges. Check that attic hatch covers, whole-house fan shutters, and drop-down stairways are insulated and sealed. Small bypasses can create outsized losses. Evaluate windows, shading, and internal gains; sometimes, solar heat gain through glazing dominates, requiring shading or low-E upgrades alongside insulation.
Revisit R-values against climate expectations. In many regions, attics should be at least R-38, with R-49 common. If current levels are below these targets or inconsistent, performance will lag. Confirm that materials haven’t been compressed by storage or foot traffic.
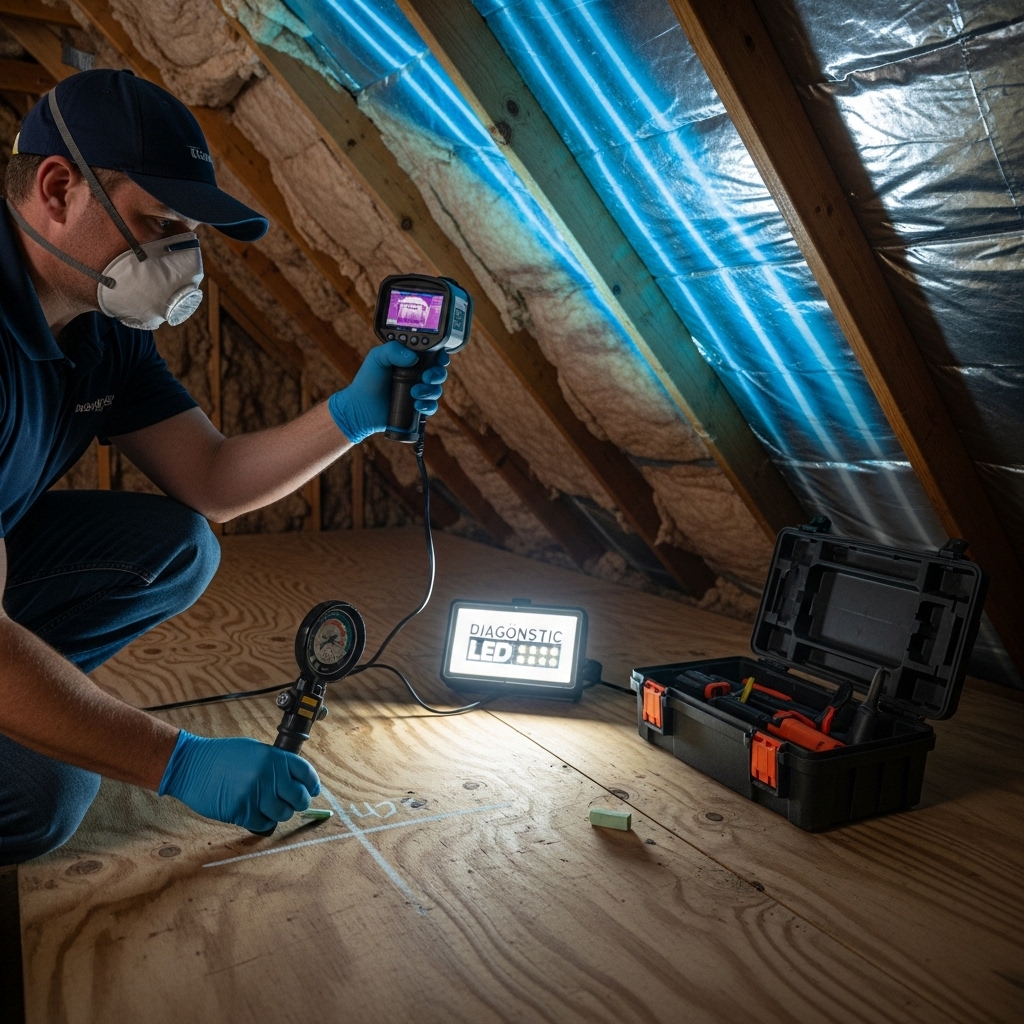
Advanced Diagnostic Techniques
Blower-door testing measures airtightness and helps prioritize sealing. Infrared thermography during a temperature differential reveals missing insulation, wind-washing at eaves, and thermal bridging through framing and structural connections. Smoke pencils and pressure mapping indicate movement of air through suspect transitions.
Moisture meters, humidity sensors, and data loggers provide insight into seasonal moisture patterns. These tools help determine whether condensation stems from indoor humidity, air leakage, or bulk water intrusion. Document findings to guide durable fixes rather than temporary patches.
Targeted Fixes: Attics
Correct wind-washing by installing or repairing baffles along eaves. Re-establish insulation depth to meet R-value targets. Create dams around hatches and equipment platforms. For recessed lights, verify IC ratings; where non-IC-rated fixtures exist, maintain clearances or retrofit with rated fixtures to allow continuous insulation coverage.
If thermal imaging shows cold stripes over joists, cross-layer batts or add depth with loose fill to reduce bridging. Seal top plate penetrations thoroughly, especially where plumbing stacks and wiring bundles pass from walls into the attic.
Targeted Fixes: Walls
For closed cavities with voids, dense-pack cellulose or fiberglass at the proper density to prevent settling. Address air leakage at top and bottom plates and around window and door rough openings. Where siding work is planned, add continuous rigid foam to cut thermal bridging, tape seams, and integrate the layer with the water and air control layers.
Pay special attention to knee walls, skylight chases, and dropped soffits—areas often overlooked during initial installation. Back knee walls with a continuous air barrier, insulate the cavity, and seal transitions to the roof and floor planes.
Targeted Fixes: Floors and Crawl Spaces
Support batts evenly against the subfloor and replace any that are damp or damaged. Seal penetrations through the floor plane to limit stack effect. If the crawl space is encapsulated, inspect the vapor control layer and perimeter seals, and consider insulating foundation walls as part of a whole-assembly approach where appropriate.
Improve drainage outside the foundation to reduce ground moisture. Persistent dampness will undermine insulation performance and contribute to indoor air quality issues.
Thermal Bridging and Continuous Insulation
Even with perfect cavity insulation, studs, joists, and rafters form a conductive lattice. Add continuous insulation where feasible—rigid foam on exteriors or cross-layered batts in attics. At rim joists, cut-and-seal foam is a reliable upgrade. Combine these with airtight detailing so the thermal layer aligns with the air barrier for maximum effect.
Inspect structural transitions—porches tied into main walls, steel beams, and ledger connections—which can short-circuit thermal performance. Where retrofits are complex, prioritize air sealing and interior finishes that reduce radiant asymmetry and draft perception.
Wildfire and Heat Considerations
In high-risk areas, ember-resistant venting and exterior sealing complement interior insulation upgrades. Mineral wool near vulnerable edges can add resilience, and radiant barrier strategies may help in high-solar-gain attics when combined with adequate ventilation and the right insulation levels.
During heat waves, shading and attic ventilation become critical. Ensure fans and vents discharge effectively, and consider increasing attic insulation to reduce peak loads on HVAC systems. Interior window treatments and exterior shading reduce solar gain that insulation alone cannot fully counter.
Quality Control and Verification
After making corrections, verify results. Repeat blower-door tests to confirm leakage reductions and conduct thermal imaging to validate uniform coverage. Inspect ventilation pathways, confirm clearances, and relabel insulation depth at the attic access. Retain photos and notes for future reference and maintenance planning.
During seasonal transitions, pay attention to comfort feedback from occupants. Temperature consistency, fewer drafts, and the absence of condensation or musty odors indicate successful troubleshooting.
Frequently Asked Questions
Q: Why do I still feel drafts after increasing attic insulation?
A: Insulation slows heat flow but does not stop air movement. Drafts point to air leakage at boundaries such as top plates, rim joists, and penetrations. Air seal first, then insulate.
Q: How can I tell if wind-washing is degrading attic insulation?
A: Look for uneven insulation near eaves and cold streaks during thermal imaging. Secure baffles and ensure soffit vents are not blasting air directly into the insulation layer.
Q: Is spray foam the only solution for tricky cavities?
A: No. Dense-pack cellulose, mineral wool cut-and-fit, and rigid foam with sealed seams can all solve specific problems when detailed properly. Choose based on the assembly, access, and moisture dynamics.
Q: What role does ventilation play in troubleshooting?
A: Balanced ventilation removes moisture and stabilizes temperatures, protecting insulation from condensation and heat stress. It is essential alongside air sealing and insulation.
Q: When should I call a professional?
A: If diagnostics require specialized equipment, if contamination or moisture damage is extensive, or if corrections involve complex assemblies, professional support is wise. It ensures durable fixes and compliance with best practices.
Put Solutions into Action
Advanced troubleshooting is about aligning materials, air control, and ventilation so they work as one system. By measuring before and after, sealing leaks, restoring uniform insulation, and protecting ventilation paths, you can resolve stubborn comfort and energy issues. When you want experienced guidance and efficient execution, schedule professional insulation installation services and return your California home to peak performance.