
Overview: Step-by-Step Insulation Removal for Malibu Attics
Removing old attic insulation is a detailed process that rewards preparation, safety, and discipline. Malibu homes face distinctive challenges—from coastal moisture and salt air to wildfire ash and hillside winds. This guide breaks the work into clear stages so you can complete a thorough, low-dust removal and prepare the attic for improved performance. As you follow the steps below, remember that every good removal sets the stage for efficient, code-compliant insulation installation and long-term comfort.
Step 1: Evaluation and Documentation
- Identify materials: Determine if your attic contains batts, blown-in cellulose, loose-fill fiberglass, or spray foam, and note approximate depths.
- Check for issues: Look for water stains, mold, rodent activity, ash, and corrosion around HVAC components.
- Photo record: Capture before shots, damaged areas, and ventilation points so you can verify improvements later.
- Access and clearance: Confirm safe entry, ladder stability, and working walkways across joists.
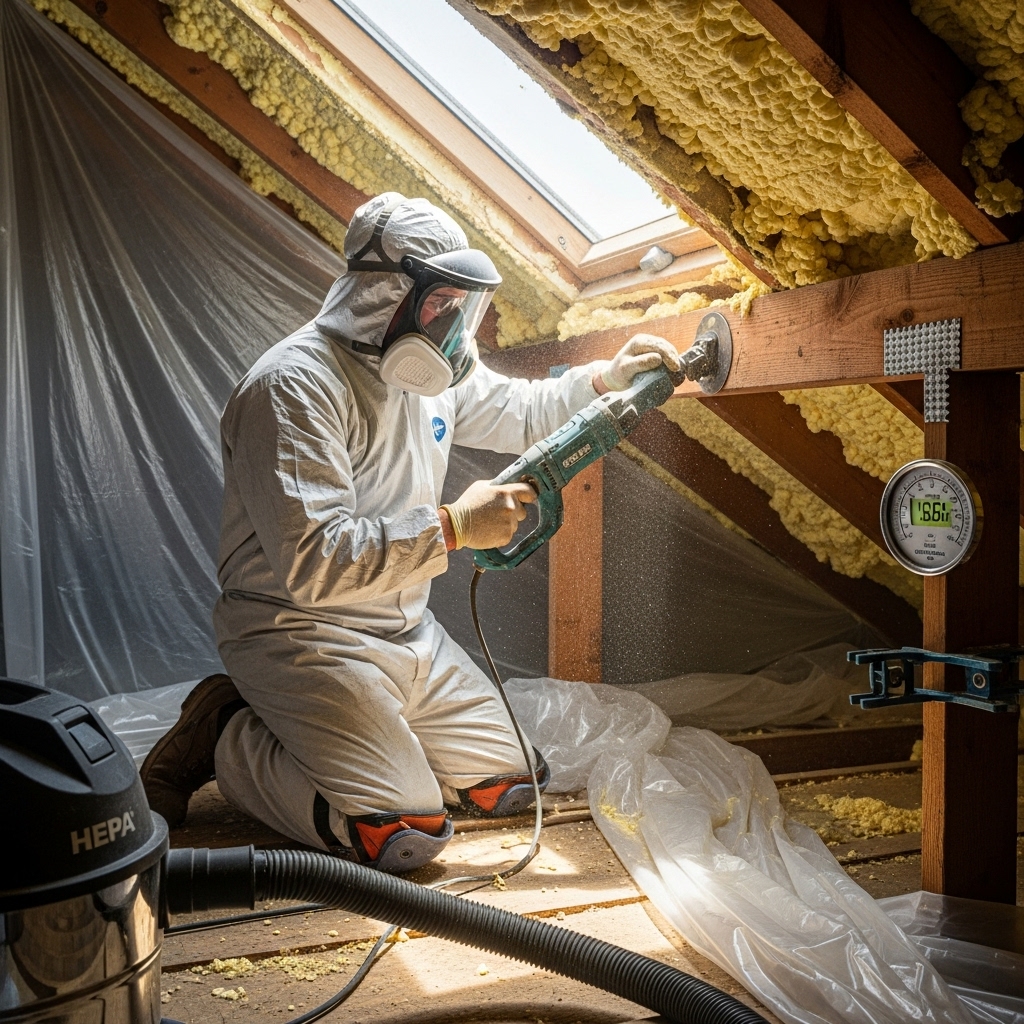
Step 2: Plan Safety and Containment
- PPE: Use a fitted respirator, goggles, gloves, and disposable coveralls. Malibu attics can be hot—schedule early and hydrate.
- Containment: Plastic sheeting over pathways and around the hatch, plus a fan exhausting to the exterior to minimize dust migration.
- Electrical: De-energize attic circuits where possible and mark junction boxes and fixtures.
Step 3: Stage Tools and Supplies
- Insulation removal vacuum with hoses long enough to reach all areas
- HEPA shop vacuum for fine debris
- Contractor bags, labels, and zip ties
- Oscillating tool and scrapers for foam sections
- LED work lights and extension cords
Step 4: Remove Obvious Debris and Clear Walkways
Pick up boards, loose trash, and stored items. Ensure safe kneeling paths along joists to reduce ceiling damage risk. Removing bulk debris first accelerates the rest of the process and reduces hazards.
Step 5: Material-Specific Removal
Batts
- Start at the far end: Work toward the hatch to avoid ferrying dust across clean areas.
- Lift and fold: Keep batts intact where possible; bag immediately.
- Watch for facing: Keep kraft or foil facings away from recessed lights unless they are rated IC and air-tight.
Cellulose (Blown-In)
- Vacuum lanes: Clear joist bay by bay, moving the nozzle steadily until you see the ceiling surface.
- Edge zones: Pay special attention near eaves and chases where material tends to pack or dampen.
- Clog control: Pause to clear the hose rather than forcing material through.
Loose-Fill Fiberglass
- Low-suction passes: Keep the nozzle close to minimize fiber drift.
- Soffit respect: Preserve airflow paths by installing baffles later and avoiding vacuuming them up.
Spray Foam
- Assess necessity: Remove only what is degraded or obstructing planned work, such as wiring changes.
- Mechanical removal: Use oscillating tools and scrapers carefully to prevent gouging deck boards.
- Surface prep: After removal, smooth residual foam and clean dust thoroughly.
Step 6: HEPA Cleaning and Decontamination
- Fine dust removal: Vacuum joists, sheathing, and top plates until surfaces are visibly clean.
- Sanitize: If rodents or ash are present, apply appropriate disinfectants with dwell time. Ventilate well.
- Odor treatment: Use enzyme-based solutions to address organic odors.
Step 7: Air Sealing and Vent Path Management
- Seal penetrations: Foam or caulk around wiring, plumbing, and gaps at top plates.
- Chimney/fire safety: Maintain clearances and use fire-rated barriers per code.
- Vent paths: Install soffit baffles to keep future insulation away from intake vents and maintain continuous airflow to the ridge or gables.
Step 8: Evaluate Attic Systems
- Ducts: Seal and insulate HVAC ducts; correct kinks or disconnected runs.
- Electrical: Address unsafe wiring and confirm junction boxes are covered and accessible.
- Bath/kitchen fans: Ensure exhaust goes outdoors through insulated ducting.
Step 9: Moisture and Weather Readiness
Malibu’s marine layer and seasonal storms can add moisture to the attic. Verify there are no active leaks, that flashings are sound, and that attic ventilation is unobstructed. Consider temporary humidity monitoring during the transition period before reinstalling insulation.
Step 10: Prepare for Re-Insulation
With a clean, sealed, and dry attic, you are ready to rebuild. Choose materials that maintain loft in coastal humidity and meet current code R-values. Coordinate the timing so your updated thermal layer is installed soon after removal to prevent dust resettlement and temperature swings. A well-sequenced project ensures your new insulation installation performs as designed and delivers long-term comfort.
Quality Control Checklist Before You Rebuild
- No visible debris, dust, or residue left on decking or joists
- All penetrations sealed, with fire-safe treatments at chimneys and flues
- Soffit baffles installed and vent paths clear
- Bath and kitchen fans ducted outside
- Documented photos of the cleaned and sealed attic
Common Pitfalls and How to Avoid Them
- Skipping containment: Leads to dust in living spaces—seal pathways and maintain negative pressure.
- Forgetting air sealing: Missing this step undermines energy performance and comfort.
- Blocking ventilation: Never pack insulation into soffits; use baffles to maintain airflow.
- Hurrying disposal: Overfilled bags burst; fill moderately and seal tightly.
- Underestimating heat: Malibu attics get hot quickly; start early and take breaks.
Frequently Asked Questions
Q: How do I choose between batts and blown-in for my rebuild? A: Consider coverage, sound control, and how your attic is framed. Blown-in offers excellent coverage over irregular areas; batts can be effective where framing is uniform and accessible.
Q: Can I remove insulation around recessed lights? A: Yes, but check if the fixtures are IC-rated and air-tight; maintain clearances as required and consider upgrading trims for air sealing.
Q: What if I find mold? A: Pause removal, identify moisture sources, and address remediation steps. Don’t encapsulate mold with new insulation without proper treatment.
Q: Do I need to disinfect if there is ash but no pests? A: A HEPA cleanup may suffice, but many homeowners also choose a light disinfectant application for peace of mind.
Q: Should I install radiant barrier during this project? A: It can help in sunny climates when paired with proper ventilation; consider the roof’s condition and your energy goals.
Malibu Considerations: Climate and Construction
- Coastal humidity and salt air: Choose materials and fasteners that resist corrosion and moisture.
- Wildfire preparedness: Seal attic openings, upgrade gable vent screens, and maintain defensible space outdoors.
- Hillside homes: Access can be limited—use lighter equipment and plan safe hauling routes.
Finish Strong for Long-Term Comfort
Follow these steps to achieve a clean, sealed, and well-prepared attic. When you are ready to rebuild, schedule expert insulation installation to lock in performance gains. The result is a Malibu home that breathes correctly, stays comfortable across seasons, and stands up better to coastal conditions.