
Planning Your Malibu Insulation Removal Timeline
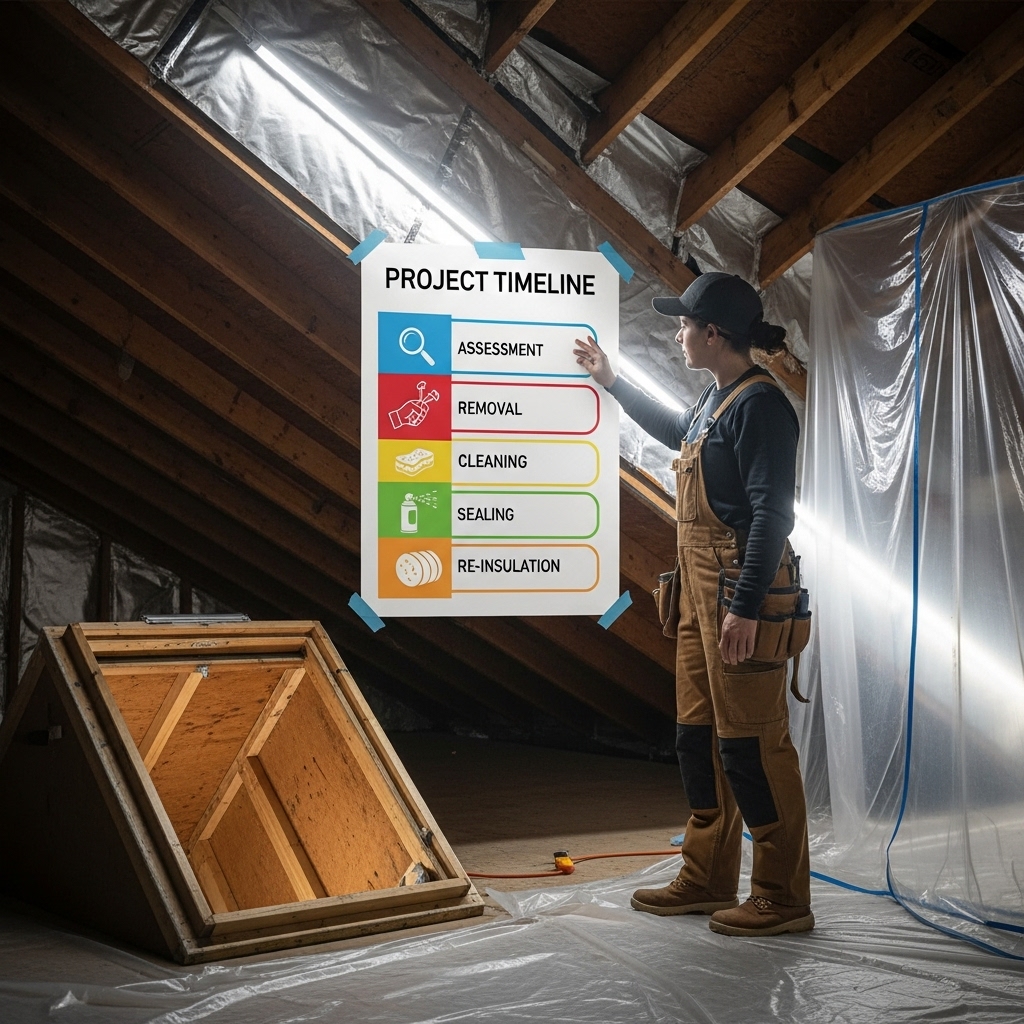
Creating a realistic timeline helps Malibu homeowners remove attic insulation safely, cleanly, and with minimal disruption. Coastal weather, hillside access, and the possibility of wildfire ash make scheduling and sequencing especially important. This timeline lays out phases—from initial assessment to final cleanup and preparation for re-insulating—so you can move efficiently and avoid common delays. With proper planning, you will be ready for a smooth, next-phase insulation installation that restores comfort and efficiency.
Phase 1: Pre-Assessment and Planning (1–3 days)
- Define scope: Decide whether you are removing insulation from the attic, crawlspace, or both. Note any tight access points or steep rooflines.
- Material identification: Determine whether you have batts, blown-in cellulose, loose-fill fiberglass, spray foam, or a mix.
- Photo documentation: Capture current conditions, including stains, ash, nests, or wiring concerns.
- Weather watch: Malibu’s marine layer and heat can influence working hours; choose cooler mornings and low-wind days.
Phase 2: Safety Setup and Containment (Half day)
- PPE: Acquire respirators, goggles, gloves, and disposable coveralls.
- Containment: Lay plastic along pathways and around the hatch. Arrange a fan to exhaust air outdoors.
- Lighting and power: Stage LED lights and safe extension cords; mark off circuits if you plan to de-energize the attic.
Phase 3: Equipment and Supplies (Half day)
- Vacuum rental or delivery: Insulation removal vacuums with sealed collection bins are ideal for loose-fill.
- Contractor bags and labels: Prepare sufficient bags and a shaded staging area outside.
- Tools: Utility knives, scrapers, oscillating tools for foam, and a HEPA vacuum for final cleanup.
Phase 4: Initial Clearing and Hazard Check (Half to 1 day)
- Remove stored items and loose debris.
- Inspect for moisture, pests, and wiring hazards. Flag areas needing repair after removal.
- Protect HVAC: Cover air handlers and ducts to prevent dust intrusion during removal.
Phase 5: Insulation Removal (1–3 days)
The duration depends on the material, attic size, and access.
- Batts: Systematically fold and bag, starting at the far end and working toward the hatch.
- Blown-in cellulose: Vacuum joist bay by bay, clearing down to the ceiling surface.
- Loose-fill fiberglass: Use careful nozzle passes to reduce airborne fibers.
- Spray foam: Mechanical removal may extend the timeline; consider professional help for efficiency and safety.
Phase 6: HEPA Cleaning and Decontamination (Half to 1 day)
- Vacuum fine dust from joists, decking, and top plates.
- Sanitize if pests or ash are present; ventilate thoroughly during dwell times.
- Odor control as needed with enzyme-based products.
Phase 7: Repairs, Air Sealing, and Ventilation Upgrades (Half to 1 day)
- Seal penetrations around wiring and plumbing stacks.
- Install soffit baffles to protect vent paths.
- Address duct leaks, fan venting to exterior, and any minor carpentry fixes.
Phase 8: Re-Inspection and Readiness Check (Half day)
- Confirm the attic is clean, dry, and debris-free.
- Verify photos of key improvements (air sealing, baffles, vented fans).
- Stage rulers or markers if you plan to measure future insulation depth.
Seasonal Considerations for Malibu
- Spring and fall: Often ideal due to milder temperatures and lower attic heat.
- Summer: Start early to avoid peak attic temperatures and schedule hydration breaks.
- After storms: Inspect for leaks and let the attic dry completely before re-insulating.
Factors That Can Extend the Timeline
- Heavy contamination: Rodent activity or wildfire ash requires additional sanitizing and bag handling.
- Spray foam removal: Time-consuming and tool-intensive.
- Tight access: Small hatches or steep rooflines slow movement and increase safety needs.
- Electrical corrections: Unsafe wiring or fixtures may need an electrician’s work before you proceed.
Ways to Compress the Schedule
- Plan containment carefully so you only set it up once and avoid rework.
- Use adequate lighting and helpers to speed safe, accurate bagging.
- Pre-stage tools in order of operation to minimize back-and-forth trips.
- Coordinate disposal runs to keep the staging area clear and efficient.
Quality Milestones
- Containment set and maintained throughout removal
- All insulation cleared to the ceiling surface or substrate
- HEPA-level cleanliness achieved
- Air sealing and baffles installed
- Visual and photo verification completed
Frequently Asked Questions
Q: Can weather delay the project in Malibu? A: Yes. High winds, heat waves, or post-storm moisture can change your schedule. Stay flexible and prioritize safety and dryness.
Q: How many people should I plan for? A: Two is a practical minimum for safe bag handling and monitoring; more helpers can accelerate bagging and disposal.
Q: What if I uncover roof leaks? A: Pause the timeline to fix leaks before re-insulating. Reinstalling insulation over active moisture risks mold and damage.
Q: Do I need to clean ducts too? A: Protect them during removal. Afterward, inspect and seal leaks; consider professional duct cleaning if dust intrusion was significant.
Q: How soon should I reinstall insulation? A: As soon as the attic is dry, sealed, and ready—minimize the period without a thermal barrier for comfort and efficiency.
Malibu-Specific Tips
- Salt air vigilance: Check metal fasteners and HVAC components for corrosion once the attic is open.
- Vent screening: Upgrade gable and soffit screens to deter wildlife intrusion.
- Wildfire readiness: Seal gaps and consider ember-resistant vent covers where appropriate.
Move Forward with Confidence
With a realistic timeline, you can manage insulation removal without unnecessary delays or risks. When your attic is clean, sealed, and dry, schedule professional insulation installation to capture the comfort and efficiency gains. Careful planning today yields a healthier, more resilient Malibu home tomorrow.