
A thorough rodent proofing inspection is the cornerstone of a pest-free home in Malibu. Coastal winds, canyon corridors, lush landscaping, and seasonal weather changes can open new pathways for rodents faster than most homeowners realize. An inspection gives you a precise map of vulnerabilities and a plan to close them—before small gaps turn into persistent problems. Whether you’re preparing a newly purchased home, addressing suspicious noises in the attic, or planning preventative work ahead of seasonal shifts, you’ll benefit from understanding what a professional inspection includes, how to prepare, and what happens next. The most effective inspections bundle building science, rodent behavior, and practical construction techniques into one visit, often forming the foundation of a comprehensive rodent proofing strategy that’s tailored to Malibu’s unique conditions.
This guide walks you through the sequence of an inspection, the tools you may see, common findings in Malibu neighborhoods, and how to read your report. You will also learn how to use the results to prioritize actions, from simple homeowner fixes to professional exclusion work and sanitation. With the right expectations, the inspection becomes a collaborative process that empowers you to take practical, effective steps toward a rodent-resistant home.
Malibu’s diverse housing stock—beach cottages, hillside contemporaries, and estate properties—means every inspection is a little different. Still, the best teams follow a consistent framework: methodical exterior review, targeted interior assessment, documentation with photos, and a clear summary with recommended next steps. Here’s how that framework usually unfolds.
Preparing for the Inspection
Preparation helps your inspector move quickly and spot subtle issues. A day or two before the appointment, do a basic tidy of access areas: clear the attic hatch, remove obstacles near crawl space entries, and ensure the garage is passable. If you have pets, plan to secure them. Note any unusual smells, sounds, or sightings, along with the times they occur. If neighbors have reported activity, that information can also guide the inspection. You don’t need to pre-clean every space, but moving storage bins and ladders to create clear paths makes a difference.
It’s also useful to think seasonally. After winter storms or Santa Ana winds, shingles can loosen, soffit vents may flex, and tree limbs sometimes rub against rooflines. These conditions can create fresh openings or damage old screens. Sharing recent weather events with your inspector provides context for what they might find.
Exterior Assessment: The First Line of Defense
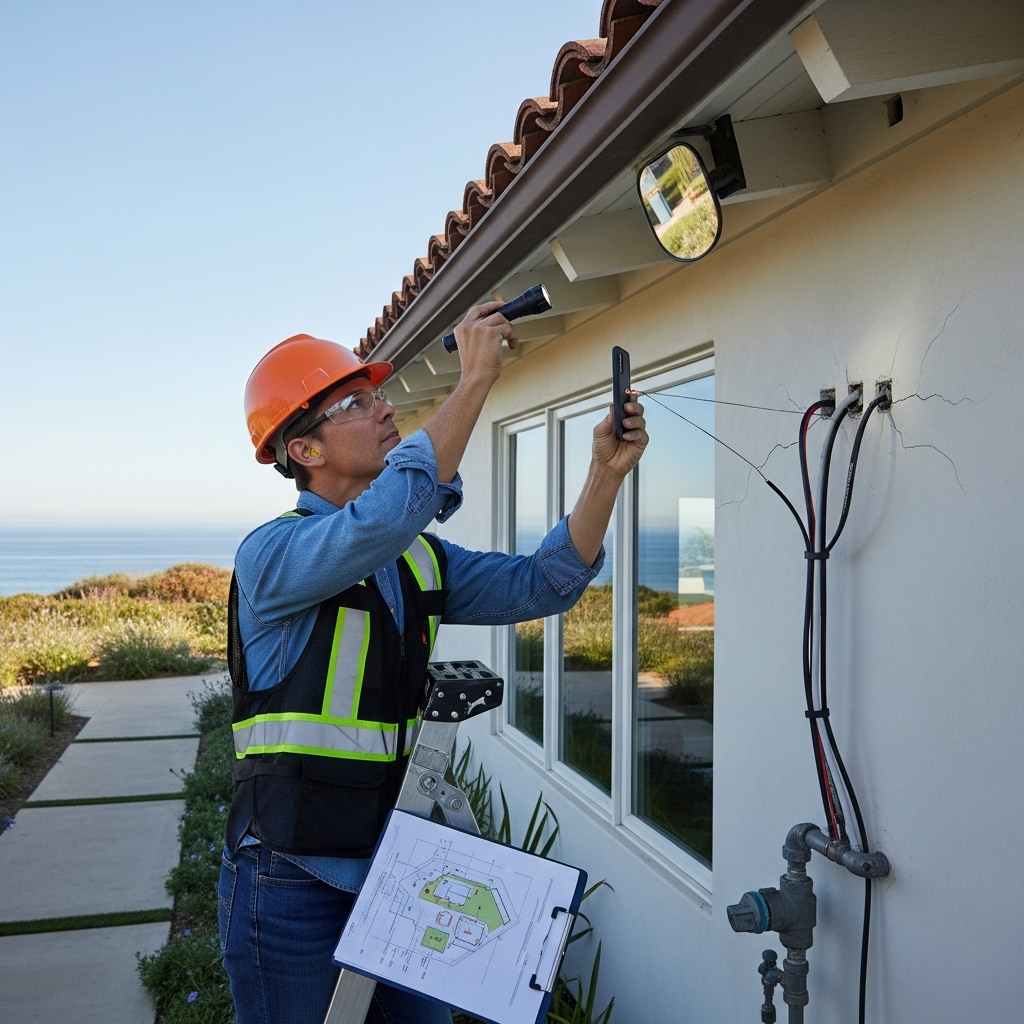
Inspections begin outdoors. The inspector walks the perimeter, scanning from the ground up and taking photos of potential entry points. They pay close attention to the following:
- Foundation and Sill Plates: Hairline cracks and gaps at material transitions.
- Utility Penetrations: Openings where gas, water, electrical, and HVAC lines pass through walls.
- Vents and Screens: Crawl space vents, gable vents, and soffit vents that may have damaged or corroded mesh.
- Doors and Garage Thresholds: Gaps beneath sweeps, worn weatherstripping, and misaligned tracks.
- Roof-to-Wall Joints and Eaves: Areas where rodents follow edges and slip under roofing.
- Chimneys and Roof Penetrations: Uncapped flues, satellite cable holes, and plumbing stacks.
- Landscaping Bridges: Trees, vines, and trellises that touch the structure, allowing access to upper levels.
During this phase, inspectors often use mirrors, flashlights, and sometimes thermal cameras to spot airflow and temperature differences that hint at gaps. They may apply non-invasive smoke or talcum powder tests to see where air is pulled into the building envelope—air currents that also pull rodent scent trails inside.
Interior Assessment: Attics, Crawl Spaces, and Living Areas
Inside, the inspection focuses on attics, crawl spaces, utility chases, and garages. In the attic, inspectors look for droppings, rub marks along rafters, gnawed wiring or ducts, and disturbed insulation that forms runways. In crawl spaces, they examine sill plates, vapor barriers, and plumbing lines for gnawing and droppings. Utility areas behind appliances and under sinks are checked for gaps where pipes and wires enter walls. The garage frequently reveals entry points at door corners and base plates, as well as clutter that can hide activity.
Moisture readings and odor assessments help distinguish old from recent activity. Fresh droppings are darker and moist, while older evidence appears faded. Inspectors may place monitors to gauge movement between visits if ongoing activity is suspected.
Documentation and Reporting
Quality inspections produce clear documentation. Expect a photo log of key findings, a floor plan or annotated site map marking entry points, and a prioritized action list. Items are ranked by urgency to help you tackle the most impactful fixes first. Your report should distinguish between exclusion needs (sealing, screening, structural adjustments), sanitation needs (removing soiled insulation or nesting materials), and maintenance items (trim vegetation, store pet food in sealed containers, tighten door sweeps). This structure makes it easy to decide what you can do yourself and what is best handled by a professional crew.
Common Malibu Findings
Certain vulnerabilities appear again and again in Malibu. Salt air and coastal humidity can corrode metal screens and fasteners over time, creating small openings. Older decorative vents with large louvers are not always rodent-proof. Rooflines exposed to high winds may develop gaps at fascia boards or flashing. In canyons and hillside neighborhoods, long utility runs—cable, phone, and power lines—give rodents convenient routes to upper stories. Down low, garage doors with worn seals or misaligned tracks are frequent entry points, as are gaps where gas lines enter the structure. Fruit trees and bird feeders can add pressure by increasing food availability near the home.
From Findings to an Action Plan
After the inspection, you’ll receive a recommended plan. The first priority is always to close entry points using durable materials that resist gnawing and weather. The second priority is sanitation—removing contaminated materials and reducing odor trails that attract new rodents. The third priority is monitoring and maintenance, including seasonal checks. Ideally, the plan will sequence work so that sealing is completed before interior sanitation is finished, ensuring rodents cannot re-enter once nesting materials are removed.
When implemented in order, these steps reduce activity quickly and cut off future incursions. Doing sanitation without exclusion, for example, can offer a short-term improvement without addressing the root cause. Combining all components produces the best long-term results.
What You’ll See During the Inspection
Inspectors typically carry ladders, protective equipment, flashlights, moisture meters, and mesh samples. You may see them remove vent covers, check chimney flues, and open attic hatches. In crawl spaces, they’ll use kneepads and headlamps to reach tight corners. They will photograph, measure, and sometimes mark areas with removable tape to guide the work crew later. Good inspectors explain as they go, pointing out evidence and answering questions so you understand the logic behind each recommendation.
How Long It Takes
Most single-family inspections take a few hours, depending on size, access, and the amount of evidence found. Complex rooflines, multiple outbuildings, or large lots can add time. If immediate safety concerns are discovered—exposed wiring or heavy contamination—the inspector will flag them and may recommend expedited remediation steps.
Homeowner Responsibilities and Collaboration
Inspections are most effective when homeowners play an active role. During the walkthrough, don’t hesitate to show inspectors where you store pet food, how often you see activity, or which areas are hard to reach. Ask to review photos together. Keep a notepad or digital checklist to track tasks you can handle, such as trimming vegetation or replacing weatherstripping. Collaboration shortens the timeline between inspection and successful exclusion.
Turning the Report Into Results
Once you have the report, prioritize high-impact fixes. Start with exterior entry points at ground level and move upward, then address interior sanitation. If the plan includes attic insulation replacement or crawl space remediation, coordinate access ahead of time by moving stored items and clearing pathways. Schedule a follow-up verification after the primary work is completed to ensure that seals are tight and activity has ceased. In many cases, a mid-implementation check reveals quick optimization opportunities—sealing one or two newly discovered gaps, for example—that pay dividends in long-term performance.
Integrating the Inspection Into a Comprehensive Program
An inspection is not a one-time event but part of an ongoing protection strategy. Schedule periodic rechecks after major weather events or landscaping changes. Consider off-season visits when contractors can spend extra time fine-tuning. When combined with practical hygiene and storage habits, these check-ins keep your home a step ahead of new pressure from surrounding wildlife and seasonal shifts. In the middle of this ongoing plan, it often makes sense to refresh key seals and confirm that your rodent proofing remains airtight.
Frequently Asked Questions
Q: Do I need to be home during the inspection? A: It’s best if you are, so you can provide context and see findings firsthand. If you cannot, arrange clear access and review the report with photos afterward.
Q: Will the inspection include inside walls? A: Inspectors do not open walls during the inspection, but they use signs like rub marks, droppings, and airflow patterns to infer travel routes. If needed, targeted openings can be planned during exclusion.
Q: What if activity is found in my attic insulation? A: Your report will outline sanitation steps, which may include removing soiled insulation and replacing it after exclusion is completed.
Q: Are traps or baits placed during the inspection? A: The focus is assessment. Some inspectors may place monitors to gauge activity between visits, with population reduction methods implemented during the service phase if appropriate.
Q: How soon after the inspection can work begin? A: Scheduling depends on scope and access. Clear communication and homeowner preparation often accelerate the start date.
Q: Are Malibu-specific building features considered? A: Yes. Inspectors account for coastal corrosion, wind exposure, architectural style, and local wildlife patterns to propose durable solutions.
Q: Will sealing reduce my home’s energy loss? A: Exclusion often improves energy efficiency by reducing unwanted airflow and preserving insulation integrity.
Ready for a Professional Inspection?
Set clear expectations, prepare your access points, and choose a provider that offers detailed reporting and durable exclusion methods. With a precise assessment and a prioritized action plan, you can stop activity at the source and protect your home season after season. To begin, schedule a thorough Malibu-focused evaluation with trusted rodent proofing specialists who can turn inspection insights into lasting results.