
Malibu’s coastal setting, hillside homes, and open eaves make attics an inviting refuge for rodents. If you’ve heard scratching overhead, found droppings near insulation, or noticed urine odors intensifying on warm afternoons, it’s time to implement a full Rodent Sanitation plan tailored to Malibu, California homes. This how-to walkthrough explains the complete process—from pre-inspection to final verification—so you can restore a safe, clean attic and prevent re-infestation. For residents who prefer professional support from day one, explore attic rodent sanitation in Malibu to see what a turnkey solution looks like.
Understand What “Rodent Sanitation” Really Means in an Attic
Rodent Sanitation is a coordinated series of tasks designed to remove contamination, neutralize pathogens, address odors, and prevent new entry. In an attic, that means more than a quick vacuum. It requires targeted removal of droppings and nesting, treatment of urine-contaminated surfaces, source-level odor remediation, and vigilant rodent exclusion to seal gaps along the roofline, vents, and utility penetrations. In Malibu, where salt air, canyon winds, and seasonal heat amplify smells and structural wear, a thorough approach protects indoor air quality and energy performance.
Key outcomes you’re aiming for include:
- Safe removal of droppings, nesting, and carcasses using HEPA-grade capture methods.
- Disinfection of affected wood, ducts exterior surfaces, and insulation-contact areas with appropriate cleaners and methods.
- Urine odor mitigation through enzymatic products, vapor-phase treatments, and ventilation.
- Sealing all entry points to stop re-entry, an essential part of rodent exclusion.
- Deciding whether to replace, top off, or spot-treat insulation based on contamination and R-value needs.
Plan the Project: Scope, Safety, and Malibu-Specific Factors
Every attic is different. Malibu homes range from beach bungalows with low-slope roofs to multilevel hillside properties with complex attic cavities. Start with a plan that accounts for structure, weather, and local living patterns.
- Weather window: Aim for dry days. Coastal fog can elevate humidity; Santa Ana winds can spread dust if containment is weak.
- Access and staging: Clear hallways to the attic hatch, protect flooring, and plan a safe material path to your dumpster or trash receptacles.
- Occupancy: Coordinate with household schedules. Keep children and pets away from the work area.
- Neighbor sensitivity: Malibu neighborhoods are quiet; minimize outdoor debris and maintain discretion when removing contaminated materials.
Gather Tools, PPE, and Materials
Prepare before you open a single insulation batt.
- Full-face or half-mask respirator with appropriate cartridges
- Nitrile or latex under-gloves with cut-resistant outer gloves
- Disposable coveralls with booties, plus eye protection
- Headlamp and portable work lights
- HEPA vacuum with sealed collection bags
- Contractor bags and heavy-duty liners
- Shovels, scrapers, and dustpans dedicated to bio debris
- Enzymatic cleaners and disinfectants labeled for bio-soils
- Odor encapsulant or sealant compatible with attic substrates
- ULV or pump sprayer for broad application (as appropriate)
- Deodorizing media such as activated carbon pouches
- Exclusion supplies: steel wool, copper mesh, hardware cloth, sealant, vent screens
- Replacement insulation (fiberglass, cellulose, or mineral wool) and rulers
- Negative air machine or temporary ventilation fan, as needed
Step 1: Detailed Attic Inspection and Mapping
Start with a careful survey. Photograph droppings, rub marks, entry points, gnawed wires, or holes around pipes. Note insulation depth and any matted areas stained by urine. Pay special attention to:
- Eave bays and soffits: Malibu’s open eaves are frequent rodent highways.
- Roof penetrations: Gaps around plumbing vents, chimneys, solar conduits, and recessed lights are common access points.
- HVAC components: Rodents sometimes nest near ducts for warmth, leaving droppings along the duct exterior or chewing the jacket.
- Gable and ridge vents: Damaged screens invite entry; note mesh gauge and condition.
- Wall tops: The top plates along exterior walls are frequent nesting and travel lanes.
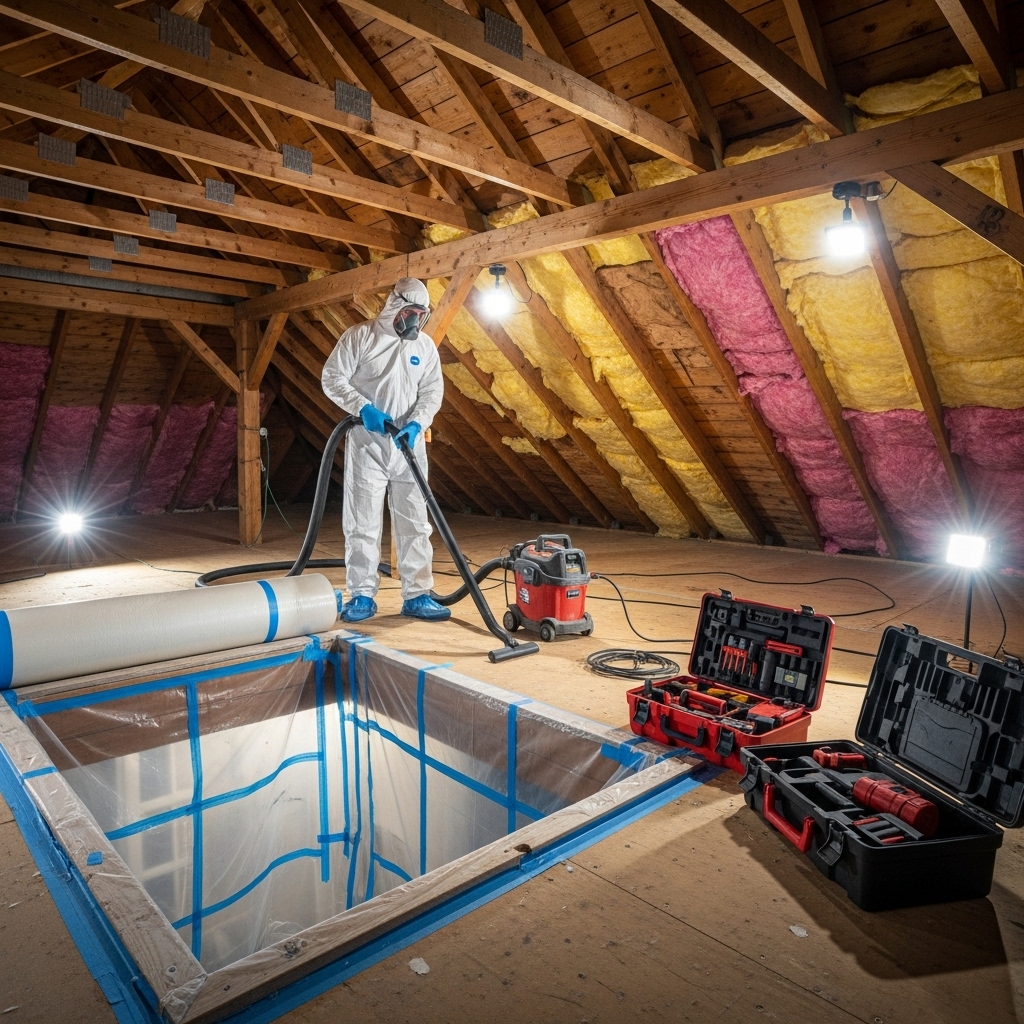
Step 2: Set Up Containment and Safe Access
Lay down poly sheeting around the attic hatch to capture debris. Isolate the work zone with temporary barriers and close interior doors to reduce dust spread. If you’re using a negative air machine, exhaust to the outdoors away from neighbors’ windows and your own fresh air intakes. Place a clean/dirty line for changing PPE and bagged debris staging.
Step 3: Remove Bulk Contamination and Nesting
Hand-pick larger clumps of droppings and nesting into lined containers. Use the HEPA vacuum to collect scattered droppings and dust, keeping the nozzle close to the surface to avoid stirring particles. Avoid dry sweeping or leaf blowers; both aerosolize contaminants. If you discover a carcass, stop and bag it carefully before continuing.
Step 4: Evaluate Insulation—Replace, Spot-Treat, or Retain
Insulation holds odors and fine particulates. Malibu’s temperature swings and summer heat can “reactivate” smells, especially urine-soaked cellulose or fiberglass. Consider:
- Replacement: If contamination is widespread, remove affected insulation completely. Vacuum residual dust down to the drywall or deck, then plan for reinstallation.
- Spot-removal: If only certain runs are affected (often along eaves), remove those sections and HEPA vacuum around them.
- Retention: If contamination is minor and localized, you may retain most insulation after thorough vacuuming and surface disinfection.
Where insulation is removed, it’s an opportunity to seal air leaks—around can lights (rated IC/AT if covered), plumbing penetrations, and wire chases—which reduces odors migrating into living areas and improves energy efficiency.
Step 5: Disinfect Surfaces and Neutralize Urine
Use an enzymatic cleaner or appropriate disinfectant on joists, sheathing edges, and other contact surfaces. Work from the most contaminated zones outward. Allow adequate dwell time per product instructions. For stubborn urine staining, apply a second pass and consider a compatible odor encapsulant to lock in residual odor molecules within porous wood.
Step 6: Deodorize With a Measured Strategy
Odor control should target sources, not just mask smells. Combine ventilation, odor-absorbing media, and, when indicated, professional-grade treatments. Malibu humidity can make odors linger; cycle fresh air through the attic when weather permits. Avoid unventilated ozone treatments in occupied homes; prioritize methods that do not create new indoor air concerns.
Step 7: Exclusion—Seal Every Entry Point
Even the best sanitation fails if rodents can re-enter. Conduct a perimeter and roofline inspection. Common Malibu entry points include warped fascia at the ocean side, corroded vent screens from salt air, and gaps where utilities penetrate stucco or siding.
- Install hardware cloth over gable, soffit, and roof vents with corrosion-resistant fasteners.
- Pack steel wool or copper mesh into small gaps, then seal with exterior-grade sealant.
- Repair gnawed areas around PVC or HVAC penetrations.
- Replace damaged attic louvers and remedy missing kick-out flashing where rodents may leverage water damage.
Step 8: Reinstall or Upgrade Insulation
Once surfaces are clean and sealed, install new insulation if needed. Malibu’s building expectations often call for higher R-values in attics; blown-in options can speed installation in tight cavities. Keep insulation clear of baffles to maintain soffit ventilation, and verify that any recessed lights are properly rated if covered. Mark rulers to show depth for future inspections.
Step 9: Final HEPA Pass, Bagging, and Disposal
Perform a final HEPA vacuum pass to capture any remaining dust. Double-bag contaminated debris and follow local solid waste guidance for disposal. Wipe down the attic hatch area and remove containment carefully to avoid recontaminating living spaces.
Step 10: Post-Work Verification and Monitoring
Complete a last inspection with a bright light. Look for fresh droppings, rub marks, or airflow paths that could carry odors. Consider setting non-toxic monitoring blocks or tracking patches near suspected entry points. Over the next week, sniff test the home after warm afternoons and check for any odor resurgence.
Where Malibu Homes Often Need Extra Attention
Beyond the core steps, certain Malibu conditions deserve special focus:
- Coastal corrosion: Metal screens and fasteners can deteriorate quickly; choose marine-resistant materials where possible.
- Canyon winds: Santa Ana events can lift dust and push attic air into living areas; reinforce air sealing.
- Wildfire ash legacy: Homes downwind of past fires may have additional particulates in attics, complicating cleanup.
- Wildlife corridors: Proximity to open space increases rodent pressure; robust exclusion is essential.
Associated Tasks That Strengthen Results
Supplemental services often make a big difference:
- HVAC duct inspection: Check for gnawing or disconnected joints that could spread odors.
- Roof maintenance: Replace missing shingles or tiles and repair underlayment gaps that create entry paths.
- Garage and pantry hygiene: Store pet food in sealed containers and manage trash to reduce attractants.
- Crawl space check: Rodents in the crawl space often travel to the attic via wall cavities; address both zones.
Health and Safety Considerations
Rodent droppings and urine may harbor pathogens. PPE, ventilation, and HEPA filtration are not optional. Keep unprotected persons out of the work area, and avoid practices that aerosolize contaminants. If you’re uncertain about products or methods, it’s wise to consult professionals who specialize in this work. For a perspective on process and scope, review what’s included in professional attic decontamination and compare it to your DIY plan.
Odor Troubleshooting After Sanitation
Sometimes a faint smell persists. Common culprits include urine-soaked wood that needs encapsulation, remaining debris hidden behind knee walls, or a missed access point allowing new activity. Use a borescope for hidden cavities and consider spot re-treatment with an enzymatic cleaner where staining remains.
Malibu-Specific Entry Points: Examples and Fixes
While every property is unique, these patterns recur locally:
- Eave blocking gaps: Replace missing baffles or blocking where rodents slip from soffits into the attic.
- Tile roof terminations: Install bird stops or wire mesh at tile ends to deter entry.
- Deck ledger penetrations: Seal gaps where decks meet exterior walls and where utilities pass through.
When to Consider Professional Help
DIY Rodent Sanitation is labor-intensive and requires careful technique. If the attic is tight, contamination is widespread, or odors remain after best efforts, a professional team can accelerate results and provide warranties on exclusion work. Malibu’s multi-level homes and steep rooflines also introduce safety challenges that may be better handled by trained crews with fall protection and negative air systems.
FAQ: Attic Rodent Sanitation in Malibu
How long does attic rodent sanitation take?
Small, lightly affected attics may take a day for cleanup and sealing, while larger or heavily contaminated attics can run several days, especially if insulation removal and reinstallation are involved. Drying time for disinfectants and odor treatments also affects the schedule.
Is it safe to stay home during attic disinfecting?
Yes, in most cases, if the work area is isolated and ventilated. Keep doors closed, protect returns from dust, and avoid the attic until work is done. Sensitive individuals may prefer to be away during chemical application and bagging.
Do I need to replace all insulation after rodents?
Not always. If contamination is localized, you can remove affected sections and clean surrounding areas. However, widespread droppings or urine saturation usually warrants full removal and replacement for best odor control and air quality.
What cleaners work best on rodent urine?
Enzymatic formulations designed for bio-soils are commonly used because they break down odor-causing compounds. Follow label directions and allow proper dwell time.
Will exclusion alone solve the problem?
No. Exclusion keeps rodents out, but without proper sanitation you may still have odors and health concerns. Combine sealing with cleaning, disinfection, and odor treatment.
Putting It All Together
Rodent Sanitation in a Malibu attic is a methodical process: inspect, contain, remove, disinfect, deodorize, exclude, reinsulate, and verify. Each step builds on the last, and overlooking one invites recurring odors or new activity. With a careful plan and the right materials, you can return your attic to a clean, protected condition and keep it that way.
If you’re ready to move from planning to action and want a local partner who understands Malibu homes, contact a team that specializes in attic decontamination and exclusion. For scheduling, scope, and timing, reach out to a provider offering Malibu rodent sanitation services and get your attic back to healthy, odor-free performance.