
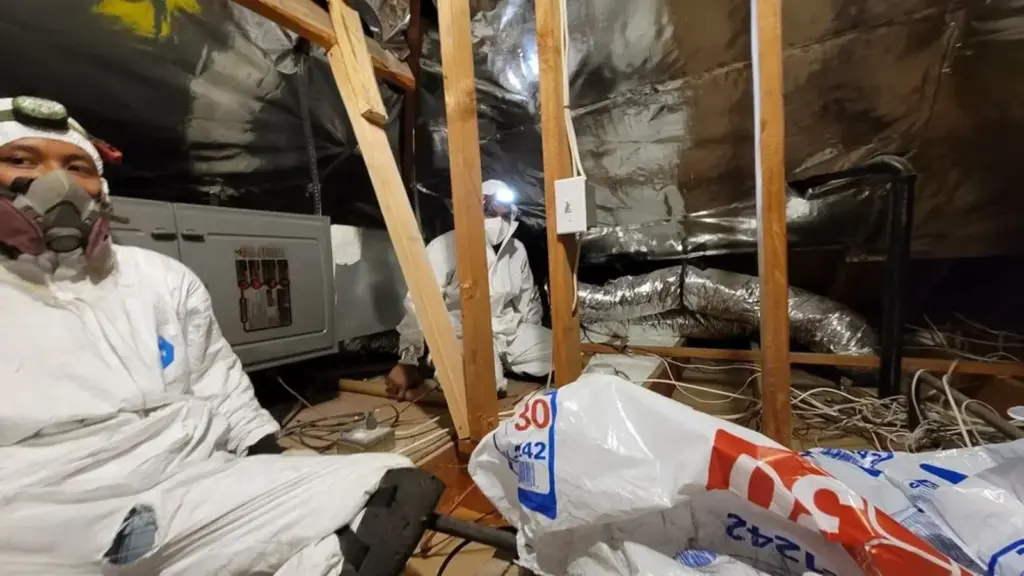
How Professional Attic Insulation Installation Works in Los Angeles Homes
Most Los Angeles homeowners know they need better attic insulation, but few know what actually happens once a contractor shows up. Understanding the full process helps you ask sharper questions, spot shortcuts, and judge whether the work was done correctly. This walkthrough covers every major step a qualified crew performs, from the first inspection to the final R-value verification, so you know exactly what to expect.
Why the Los Angeles Climate Makes Attic Insulation Unusually Important
Heat Gain Is the Primary Enemy Here
In most of the country, insulation is mainly about keeping heat inside during winter. In Los Angeles and the surrounding Ventura County corridor, the bigger problem runs in the opposite direction. On a summer afternoon, an uninsulated or under-insulated attic can reach temperatures well above 140°F. That radiant heat pushes down through your ceiling, forcing your air conditioner to work much harder than it should. Proper insulation acts as a thermal barrier, slowing that heat transfer significantly.
The Mild-Winter Trap
Because Southern California winters are relatively gentle, many homeowners assume their attic insulation is fine. The logic goes: if the house feels comfortable in January, the insulation must be adequate. That reasoning misses the point. Comfort in mild weather tells you almost nothing about performance during a July heat wave. Many older Los Angeles homes were built with insulation levels that met code decades ago but fall well short of current Department of Energy recommendations for Climate Zone 9 and 10, which cover most of the LA basin and Ventura County.
Older Housing Stock and Degraded Materials
A large share of LA-area homes were built between the 1950s and 1980s. Insulation from that era often consists of fiberglass batts that have compressed, shifted, or absorbed moisture over time. Compressed batts lose R-value because the insulating effect comes from trapped air, not from the fiberglass itself. When a professional assesses an older attic, degraded material is one of the first things they look for.
Step 1: The Pre-Installation Attic Inspection
What the Technician Is Actually Looking For
A thorough inspection takes anywhere from 30 minutes to over an hour depending on attic size and accessibility. The technician is not just glancing at insulation depth. They are checking for existing damage, moisture staining on the sheathing, signs of rodent activity, the condition of any HVAC ducts running through the space, and the location of air-sealing opportunities. Each of these findings shapes what happens next.
At LA Attic Pro, this inspection phase is treated as a diagnostic, not a formality. Skipping it or rushing through it is how contractors end up installing new insulation over conditions that will undermine its performance from day one.
Measuring Existing R-Value
The technician will measure the current insulation depth at multiple points across the attic floor. Depth alone does not tell the whole story, because different materials have different R-values per inch, but it gives a reliable baseline. They will also note whether coverage is even or whether there are thin spots near eaves, around ceiling fixtures, or along top plates where insulation tends to settle away from the edges over time.
Identifying Air Bypass Locations
This step is critical and often skipped by less thorough contractors. Air bypasses are gaps in the thermal envelope where conditioned air escapes or unconditioned attic air enters. Common locations include recessed light cans, plumbing chases, top plates where interior walls meet the ceiling, and gaps around HVAC boots. As LA Attic Pro’s own project notes point out, new insulation sitting on top of open air bypasses will not deliver the energy savings you expect, because the insulation works by trapping still air. Moving air bypasses that barrier entirely.
Step 2: Removing Old or Damaged Insulation
When Removal Is Necessary
Not every job requires a full removal. If existing insulation is in good condition, clean, and at a reasonable depth, a professional may recommend simply adding material on top. However, removal is necessary when the existing material is contaminated with rodent droppings or urine, when it has absorbed moisture and lost structural integrity, or when it is so compressed that adding on top would create uneven coverage that traps the old material’s problems underneath.
The Vacuuming Process
Professional insulation removal uses a high-powered vacuum system with a hose that runs from a truck or trailer-mounted unit directly into the attic. The technician moves the hose systematically across the attic floor, pulling loose-fill or broken-up batt material into a collection bag outside the home. This keeps the debris contained and prevents it from circulating through the house. The process is thorough but time-consuming, particularly in larger attics with deep accumulations of old material.
Disposal and Sanitation
Once the old insulation is removed, the attic floor and framing are inspected again. If rodent activity was present, attic sanitation and decontamination is performed before any new material goes in. Applying fresh insulation over contaminated surfaces traps the problem rather than solving it. Proper sanitation includes treating affected areas and allowing adequate drying time before installation begins.
Step 3: Air Sealing Before Any Insulation Goes In
Why This Step Comes Before the Insulation
Air sealing has to happen while the attic floor is accessible. Once insulation is in place, reaching the gaps around top plates, plumbing penetrations, and electrical boxes becomes nearly impossible. Contractors who skip air sealing, or who do it as an afterthought, are leaving a significant portion of the potential energy benefit on the table.
The most common air sealing materials used in this step are fire-rated caulk for smaller gaps and two-part spray foam for larger penetrations. Recessed light cans that are not rated for insulation contact (IC-rated) are either replaced or capped with an airtight cover before insulation is applied over them.
Top Plates and Wall Cavities
The gap between the top of an interior wall and the attic floor is one of the largest and most overlooked air bypass locations in older Los Angeles homes. Framing from the mid-20th century often left these areas completely open. Sealing them with spray foam can make a noticeable difference in how quickly a room heats up on a summer afternoon, independent of the insulation layer itself.
Duct Connections and HVAC Boots
If HVAC ducts run through the attic, the technician checks the connections at each register boot where the duct meets the ceiling. Loose connections here allow conditioned air to dump directly into the attic instead of reaching the living space. This is an HVAC issue, but it intersects directly with insulation performance. LA Attic Pro offers air duct repair and replacement as part of a comprehensive attic service, so these issues can be addressed in the same project rather than requiring a separate contractor visit.
Step 4: Choosing and Installing the Right Insulation Material
Blown-In Fiberglass vs. Blown-In Cellulose vs. Batts
The table below summarizes the practical differences between the three most common residential attic insulation types used in the Los Angeles area.
| Material | R-Value per Inch (approx.) | Best Application | Key Consideration |
|---|---|---|---|
| Blown-In Fiberglass | 2.2, 2.7 | Open attic floors, topping off existing insulation | Lightweight, non-combustible, resists moisture absorption |
| Blown-In Cellulose | 3.2, 3.8 | Full attic floors, dense-pack applications | Made from recycled content, denser coverage, can absorb moisture if not managed |
| Fiberglass Batts | 2.9, 3.8 (depending on thickness) | New construction, accessible joist bays | Faster to install in open framing, but gaps at edges reduce effective R-value |
For most existing Los Angeles homes with finished ceilings below, blown-in material is the practical choice. It fills irregular joist bays completely, covers obstructions, and reaches tight spots near eaves that batts cannot reach without custom cutting.
Calculating the Target R-Value
The Department of Energy recommends R-38 to R-60 for attics in the climate zones covering most of Southern California. The exact target depends on your existing insulation level, the age and construction of the home, and whether you are also addressing air sealing in the same project. A qualified attic insulation contractor will calculate the additional depth needed to reach the target R-value based on the material being installed and the existing conditions measured during the inspection.
The Installation Process Itself
For blown-in insulation, the crew uses a blowing machine connected to a large bag of loose-fill material. One technician feeds the machine while another works inside the attic, directing the hose to distribute material evenly across the floor. Depth gauges, called insulation rulers or depth markers, are placed at regular intervals before blowing begins so the technician can verify coverage depth as they work. The process for a typical 1,500-square-foot attic floor takes a few hours, though preparation and cleanup extend the total project time.
Baffles, also called rafter vents or chute vents, are installed at each rafter bay near the eaves before insulation is blown in. These cardboard or foam channels keep a clear airway between the soffit vents and the attic space, which is essential for proper ventilation. Blocking soffit airflow with insulation creates moisture problems and reduces the effectiveness of the entire ventilation system.
Step 5: Post-Installation Verification
Depth and Coverage Checks
After the blowing is complete, the technician walks the attic floor and checks depth at multiple points using a measuring rod. They are looking for consistent coverage with no thin spots, particularly near the eaves, around ceiling fixtures, and along the perimeter. Any low spots are filled before the crew leaves.
Visual Inspection of Air Sealing Work
The technician also does a final visual pass to confirm that all air-sealing work is covered properly and that no foam or caulk was disturbed during the blowing process. Duct connections, if repaired as part of the project, are re-checked at this stage.
Documentation the Homeowner Should Receive
A professional attic insulation service should provide the homeowner with written documentation that includes the material installed, the R-value achieved, the square footage covered, and the depth of installation. This documentation matters for utility rebate applications, for future contractors who work in the space, and for disclosure if you sell the home. If a contractor does not offer this documentation, ask for it specifically.
Common Shortcuts That Undermine the Whole Project
Installing Over Contaminated Material
This is the most consequential shortcut. Rodent contamination, mold, or heavily moisture-damaged insulation cannot simply be buried under new material. The odors, the biological matter, and the compromised R-value of the old layer all persist. A homeowner may not notice the problem immediately, but it will resurface.
Skipping the Baffles
Omitting rafter baffles is a fast way to block soffit ventilation. When soffit vents are blocked, the attic loses the passive airflow that removes heat and moisture. The insulation may test well on day one, but the moisture accumulation over subsequent seasons can degrade the material and the roof structure above it.
No Air Sealing Before Insulation
As discussed earlier, insulation and air sealing are separate but complementary measures. Insulation slows heat transfer by conduction. Air sealing stops heat transfer by convection, the movement of air carrying heat through gaps. A project that addresses only one of the two will always underperform relative to one that addresses both.
What to Ask an Attic Insulation Contractor Before Hiring
Before committing to any attic insulation service in Los Angeles, these questions help you evaluate whether a contractor is thorough or just fast.
- Will you inspect the attic before quoting? Any quote given without an in-person inspection is based on assumptions, not conditions.
- Does your quote include air sealing, or is that a separate line item? Understanding what is and is not included prevents surprises.
- What material do you recommend for my attic, and why? A good contractor explains the reasoning, not just the product name.
- Will you install rafter baffles at the eaves? This is a basic code requirement and a mark of quality work.
- What documentation will I receive after installation? R-value, material, and depth should all be in writing.
- Do you handle insulation removal if needed, or do I need a separate contractor? A full-service attic contractor handles removal, sanitation, and installation under one roof, which simplifies scheduling and accountability.
Frequently Asked Questions
How long does a typical attic insulation installation take in an LA home?
For a standard single-story home, the installation itself usually takes half a day to a full day. If the project includes removal of old material and air sealing, plan for a full day or occasionally two, depending on attic size and the extent of prep work needed.
Do I need to be home during the installation?
You do not need to be present the entire time, but most homeowners prefer to be available at the start for the walkthrough and at the end to review the completed work. The crew accesses the attic through an interior hatch or exterior access point and does not need to move through your living space during the job.
Can new insulation be added on top of old insulation?
Yes, if the existing material is clean, dry, and in reasonable condition. The technician evaluates this during the pre-installation inspection. If the old insulation is contaminated, moisture-damaged, or heavily compressed, removal is the better path before adding new material.
What R-value should Los Angeles attics target?
The Department of Energy recommends R-38 to R-60 for the climate zones covering the LA basin and Ventura County. Many older homes in the area have R-11 to R-19, which means there is significant room for improvement in most cases.
Will new attic insulation reduce my energy bills?
Properly installed insulation, combined with air sealing, typically reduces the load on your HVAC system. How much you notice on your bill depends on your current insulation level, how much air sealing was done, and how you use your cooling and heating systems. Homes starting from very low R-values tend to see the most noticeable change.
Does LA Attic Pro serve areas outside Los Angeles?
Yes. LA Attic Pro serves homeowners throughout Ventura County and the greater Los Angeles area, including communities where older housing stock and warm-season heat gain make attic performance a practical priority.
Conclusion
A professional attic insulation installation in Los Angeles is not a single action, it is a sequence of interdependent steps, each of which affects the outcome of the ones that follow. Inspection, removal when needed, air sealing, proper material selection, careful installation, and post-job verification all have to happen in the right order to deliver the performance the project promises. If you want to see how this process applies to your specific attic, schedule your attic insulation assessment with LA Attic Pro and get a clear picture of what your home actually needs.