
A Beginner-Friendly Overview
Starting your first attic insulation project can feel overwhelming, especially in a coastal city like Malibu where salt air, fog, and intense sun all influence home performance. This beginner checklist breaks the job into simple stages so you can plan smart, stay safe, and achieve dependable results. Use this guide whether you intend to DIY or to supervise a contractor’s work. As a foundation, remember that effective attic insulation pairs with thorough air sealing and balanced ventilation to deliver steady indoor comfort throughout the year.
Set aside time to prepare your attic, assemble tools, and understand basic terms like R-value, baffles, and IC-rated fixtures. A well-organized checklist will help you avoid common mistakes and deliver insulation that performs for years.
Pre-Inspection Checklist
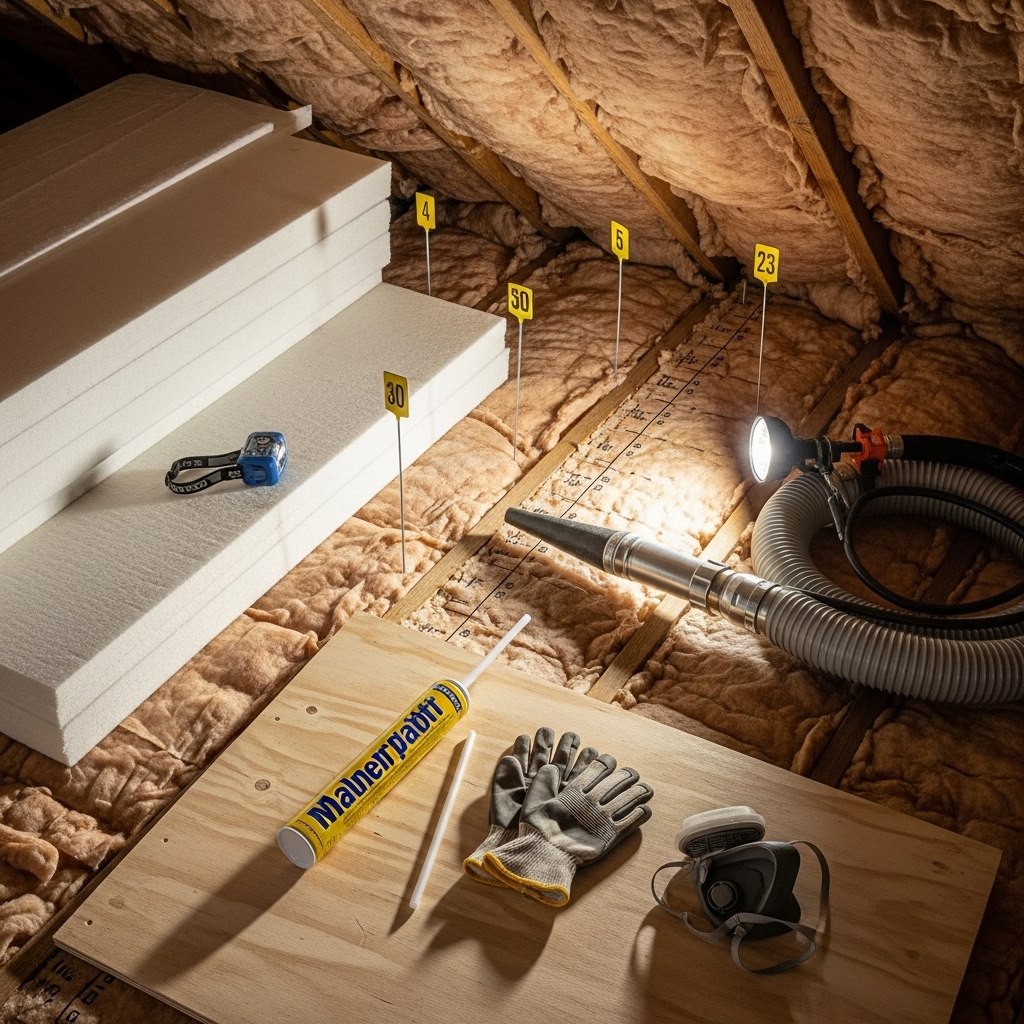
– Safety first: Plan protective gear including gloves, long sleeves, eye protection, and a respirator rated for particulates. – Attic access: Confirm a safe ladder, sturdy hatch, and adequate lighting. – Structural check: Look for damaged framing, sagging sheathing, or signs of roof leaks. Address structural and roof issues before insulating. – Moisture signs: Staining, rust, or musty odors suggest leaks or improper venting; correct these issues first. – Pests: If you see droppings, nests, or chewed wiring, schedule remediation before you add new material. – Existing insulation: Note type, depth, and condition. If it is matted, wet, or contaminated, plan removal and cleanup before upgrading.
Air Sealing Essentials
Air sealing prevents conditioned air from escaping and moisture from migrating into the attic. Mark and seal the following:
– Top plates and seams where drywall meets framing. – Plumbing and wiring penetrations through the ceiling plane. – Bath fan housings and chases. – The attic hatch perimeter. Use caulk, foam, and appropriate fire-rated materials where required. Air sealing maximizes the impact of your insulation and helps maintain healthy humidity levels.
Ventilation Setup
Balanced ventilation is essential. Install baffles at soffits to preserve airflow from intake vents to ridge or roof vents. Check that bath and kitchen fans exhaust outdoors. Good ventilation reduces summer heat buildup and mitigates moisture risk in Malibu’s coastal conditions.
Materials and Tools Checklist
– Insulation options: Fiberglass batts, fiberglass loose-fill, cellulose, or mineral wool. – R-value plan: Aim for R-38 to R-49 in open attics, depending on current code and existing conditions. – Depth markers: For loose-fill, place them across the attic to verify installed depth. – Hatch insulation: Rigid foam for the hatch and weatherstripping for a tight seal. – Tools: Utility knife, straightedge, staple gun, tape measure, headlamp, work lights, and boards or kneeling platforms. – Air sealing supplies: Foam, caulk, rigid foam, tape, and sealing accessories.
Safety Checklist
– Power considerations: If you will be working near electrical, turn off relevant circuits and never bury junction boxes. – Heat sources: Maintain clearances around chimneys, flues, and non-IC-rated lights. – Walking: Only step on joists or secure boards; never on the ceiling drywall. – Debris cleanup: Keep pathways clear to avoid tripping hazards.
Installation Checklist: Loose-Fill
1) Prep with baffles and depth markers. 2) Air seal penetrations and weatherstrip the hatch. 3) Stage the blower and route the hose safely. 4) Begin at the far end and work back toward the hatch, keeping the hose level and moving steadily for uniform coverage. 5) Watch your markers and follow the manufacturer’s chart to reach your target R-value. 6) Build a small containment dam around the hatch and create a landing area for future access.
Installation Checklist: Batts
1) Measure bays and cut batts to fit without compressing. 2) Split around wiring and pipes; do not stuff insulation into gaps. 3) Add a perpendicular second layer across joists if needed to reach the total R-value. 4) Insulate the hatch panel with rigid foam and secure weatherstripping on the frame.
Mid-Project Quality Check
Stop halfway to assess coverage, depth, and ventilation pathways. Correct low spots, gaps, or compression. Reconfirm soffit baffles remain open and attic ventilation is intact. This is the perfect moment to verify that the selected attic insulation is delivering continuous, unbroken coverage.
Final Inspection Checklist
– Depth and R-value: Verify thickness throughout, not just near the hatch. – Hatch and weatherstripping: Confirm a tight seal and adequate hatch insulation. – Clearances: Check around flues and non-IC-rated lights. – Junction boxes: Ensure visibility and access. – Photos and notes: Document your work for future reference.
Seasonal Maintenance Checklist
– Spring: Inspect after winter rains for any moisture issues or displaced material. – Summer: Confirm ventilation remains clear before peak heat. – Fall: Check for pest activity and seal any new gaps. – Winter: Observe indoor comfort and attic conditions on cooler nights; adjust as needed.
Common Beginner Mistakes
– Skipping air sealing before insulating. – Blocking soffit vents by omitting baffles. – Compressing batts or underfilling loose-fill. – Forgetting to insulate and seal the attic hatch. – Covering non-IC-rated recessed lights with insulation.
Frequently Asked Questions
Q: What R-value should I target? A: Many Malibu homeowners aim for R-38 to R-49 in open attics; verify local code and your roof configuration.
Q: Can I lay new insulation over old? A: Yes, if the old material is clean and dry. Level it, fix air leaks, and add new material to reach your target.
Q: How do I prevent moisture problems? A: Vent bath and kitchen fans outside, keep soffits clear with baffles, and prioritize air sealing at the ceiling plane.
Q: Are batts or loose-fill better for beginners? A: Loose-fill covers irregular spaces well, while batts are straightforward in consistently spaced joists. Choose the method that best fits your attic layout and comfort with tools.
Q: Is professional help necessary? A: Many beginners can handle basic open attics. Consider a professional if your attic has complex mechanicals, tight access, or signs of moisture or pest contamination.
Make Your Malibu Home More Comfortable
With an organized checklist, safe work habits, and a clear R-value goal, beginners can achieve a successful attic upgrade. Take your time, document your progress, and focus on air sealing and ventilation alongside the insulation layer. If you want extra confidence and polished results, partner with local specialists who understand Malibu’s climate and construction styles. When you are ready to act, schedule an assessment and choose high-quality attic insulation to elevate comfort in your home.