
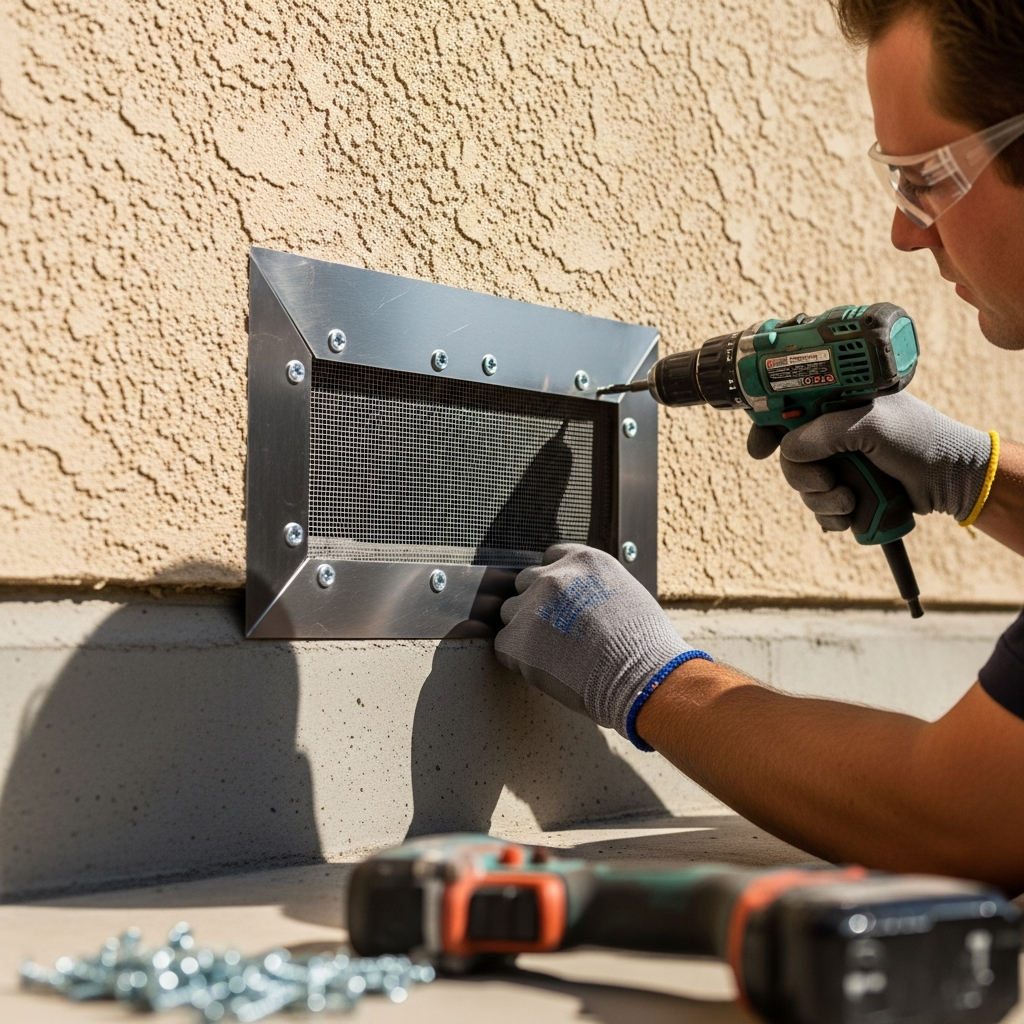
In Los Angeles, exterior walls are your first and most important line of defense against rodents. From stucco facades common in Spanish and Mediterranean homes to wood siding in canyon areas and the hybrid finishes on many remodels, each surface interacts with the environment in ways that create potential openings. Warm days, cool nights, and winter rains all act on materials, expanding and contracting joints and seams. With time, tiny imperfections become steady pathways for curious intruders. Understanding how to evaluate, reinforce, and maintain these walls is key to keeping your home quiet at night and your attic and crawlspace free of unwanted guests. If you are just beginning to assess your property, start by reviewing modern methods of exterior rodent proofing so you can differentiate between quick patches and durable, system-level solutions.
What makes exterior wall proofing challenging in LA is the city’s range of microclimates and construction eras. Coastal homes face salt-laden air that shortens the life of mild steel and cheap fasteners. Valley homes contend with punishing UV exposure and heat that can dry out sealants and weaken plastic vents. In hillside neighborhoods, the geometry of terraces, stairs, and fences creates natural ladders that deliver rodents straight to vulnerable roof-wall intersections. Each of these realities requires specific techniques and materials to ensure the work holds up season after season.
Reading the Exterior Envelope Like a Map
Effective proofing begins with a visual narrative. Stand back and look at how grade slopes toward or away from the structure, how downspouts discharge, and where utilities enter. Then move close and study each penetration. Gas lines, AC refrigerant lines, hose bibbs, conduit runs, cable and fiber entries—each hole through the wall deserves its own solution. The best technicians treat every penetration as a unique joint between dissimilar materials. They use metal mesh packed snugly around round pipes, then finish with a UV-stable exterior sealant that bonds well to both the pipe and the surrounding wall. Square holes receive metal patches cut to shape and mechanically fastened, then sealed. This combination of mechanical barrier and sealed interface discourages chewing and resists weathering.
On stucco walls, the weep screed at the base is crucial for moisture management. Blocking this channel can trap water, yet leaving it open can invite pests. The right approach installs custom-formed, pest-resistant screening that preserves drainage while excluding rodents. Similarly careful work is required at siding-to-foundation transitions, where undulating lines can conceal consistent gaps. Inspectors who know local construction can spot these patterns and propose the right mix of screen, flashing, and sealant without compromising building health.
Windows, Doors, and the Importance of Movement Joints
Openings for windows and doors are framed with trim that moves differently than the surrounding wall. Over time, hairline cracks appear where trim meets stucco or siding. These cracks may not be obvious, but repeated chewing by determined rodents can turn a subtle flaw into an entry point. Technicians address these joints with flexible, weather-rated sealants and backer materials where needed, supporting the joint against seasonal movement while resisting gnawing at exposed edges. Door thresholds and garage door seals deserve special attention, as compressed or sun-brittled rubber can leave clean half-inch gaps that function like invitation signs.
Vents near doors and windows are equally important. Dryer vents, bathroom exhausts, and kitchen hoods require pest-resistant covers that maintain airflow. Thin plastic louvers found on many tract homes can warp quickly. Replacing them with rigid, corrosion-resistant metal and a fine, durable screen makes a dramatic difference. The fit and fastener choice should reflect exposure to wind and sun, anchoring the cover solidly to the wall’s structural backing rather than just the finish layer.
Foundation Lines and Grade Transitions
Where the wall meets the ground, subtle shifts in grade can create constant openings. In homes with planters or mulch that creep up against the wall, the interface can hide tunnels. Proofing here involves more than pushing soil back. It may include adding a narrow gravel buffer that discourages burrowing and allows easy visual inspection, paired with screening or flashing at the sill. Where stem walls step down at slopes, small gaps can open in the corners. Addressing these with tailored metal pieces that follow the geometry prevents predictable reentry points.
Crawlspace vents at grade are a classic vulnerability. Many original vents feature wide openings meant for air movement but not pest exclusion. The solution is not to block them, but to replace or overlay them with robust, corrosion-resistant screens framed to the vent body. Proper framing prevents future rattling and distortion, which can otherwise create a triangular gap at one corner—the exact spot rodents test first.
Roof-Wall Intersections and Eaves
The junction where walls meet roof planes is a high-traffic area for rodents. Open eaves, decorative rafter tails, and fascia transitions can conceal repeating cracks and nail holes. The right solution uses sheet-metal flashing, precisely cut and hemmed, to bridge these lines without trapping water. Where soffit vents are present, they should be backed with durable mesh that maintains vent free area while closing pest-sized gaps. Technicians must balance exclusion with ventilation, ensuring the attic continues to breathe through properly screened pathways.
Tile and shingle roofs introduce different considerations. With tile, rodents explore under the first course and test the bird stops. With shingles, they probe at step flashings along walls. An inspection that includes a careful walk-around and selective roof access is essential. By addressing both sides of the roof-wall intersection, a team prevents the common pattern of sealing one side while leaving a parallel route open a few feet away.
Material Choices for LA’s Climate
Material selection makes or breaks exterior wall proofing. In coastal zones, stainless fasteners and mesh outlast plain galvanized options. Inland, UV-stable sealants and paints are crucial to prevent premature cracking. For mesh, selecting a gauge that resists deformation under hand pressure, paired with fasteners sized for the underlying substrate, ensures the barrier stays tight. Foam alone is never the answer on an exterior wall; rodents chew it easily, and sun destroys it quickly. Instead, foam—if used at all—functions only as backing behind metal and sealant, never as the exposed surface.
The finish also matters aesthetically. Well-executed proofing can be discreet. Screens should be cut square and painted to blend. Flashing edges should tuck under trim where possible. This attention to appearance keeps your home looking cared for and reduces the chance that future trades disturb the work out of frustration with an unsightly install.
Sequencing for Success
Exterior wall proofing benefits from a consistent sequence: perimeter assessment, utility penetration sealing, vent upgrades, foundation line reinforcement, and finally roof-wall intersections. This order interrupts the most common access paths first and ensures that the building envelope is tightened systematically. After sealing, interior spaces such as attics and crawlspaces are quieter and cleaner, making it easier to confirm that movement has stopped. Follow-up checks focus on high-pressure zones like garage door seals and the sides of the house most exposed to wind-driven debris.
In the middle of this process, it is wise to compare your plan to trusted guidance on comprehensive rodent proofing so you can validate that every exterior step supports long-term interior calm. An aligned plan gives you confidence that all the typical LA weak points—vents, penetrations, grade transitions, and roof-wall details—are addressed together.
Living With Well-Sealed Walls
After proper exterior wall proofing, daily life gets quieter in subtle ways. You do not hear nighttime tapping above a bedroom window or along the garage wall. You do not find insulation debris near access hatches. Your dryer runs without a flap rattling in the wind. Perhaps most importantly, you begin to trust that the building envelope is keeping nature in its rightful place outside. This peace of mind is the true measure of success, even more than any single patch or screen.
FAQ: Exterior Wall Rodent Proofing in Los Angeles
How do I tell if an exterior wall gap is an actual entry point?
Look for supporting evidence: rub marks, droppings nearby, or windblown nesting material tucked into the gap. Nighttime noises from the same wall section are another clue. A professional inspection ties these signs together to confirm active pathways.
Will screening vents reduce airflow?
Properly selected and installed screens maintain required free area for ventilation. The key is using the right mesh size and ensuring it is framed tightly so it does not buckle or restrict openings over time.
Can I rely on caulk alone for exterior holes?
Caulk is excellent for sealing hairline joints but not for gaps large enough to invite chewing. A durable approach uses mechanical barriers such as metal mesh or flashing first, followed by sealant to lock the barrier in place and weatherproof the joint.
What about weep screeds and drainage paths?
These must remain functional to manage moisture. Proofing techniques for weep screeds employ shaped screening that preserves drainage while excluding pests. Blocking them outright can cause water damage.
How often should I check exterior walls after proofing?
Seasonal checks are smart, particularly after windstorms or heavy rain that can shift debris and expose weak points. Quick visual inspections around vents, utility penetrations, and grade transitions help you catch issues early.
Is exterior wall proofing different for homes with siding versus stucco?
Yes. Siding often requires attention to lap joints and trim intersections, while stucco involves managing movement cracks and the weep screed. The principles are the same—mechanical barriers plus weather-appropriate sealants—but the details differ by finish.
If you are ready to turn your home’s exterior walls into a strong, discreet shield that keeps the quiet in and pests out, schedule a thorough evaluation with a local team that understands our climate and construction. For reliable help grounded in building science and attentive craftsmanship, connect with experts in Los Angeles rodent proofing and enjoy the lasting calm of a well-protected home.